Kitchen Floor Cleaning

Travertine Tiled Kitchen Floor Renovation Leeds Village

Large Travertine Floor Cleaned and Polished in Leeds Village

I was contacted about a Georgian property in the Kent village of Leeds , to see if I could do anything to improve a Travertine tiled floor. The use of Travertine was extensive and had been installed throughout the ground floor including the kitchen, dining room, utility and bathroom WC. Travertine is probably my favourite stone, but it is acid sensitive and attracts dirt easily, due to its ‘holey’ composition.

Travertine Tiled Floor Before Cleaning Leeds Village

Initially we discussed the floor over the phone where I got to know about the issues they were experiencing, and I detailed the renovation process I normally use to restore it including the products and timelines. Naturally they wanted to me to provide a quote for the work however its tricky to do that accurately without seeing the floor, so I arranged a date to pop over.

Travertine Tiled Kitchen Floor Before Cleaning Leeds Village Travertine Tiled Floor Before Cleaning Leeds Village

Upon arriving I could see the tiles and the wide grout joints had extensive, ingrained dirt indicating the previous sealer had long since worn away. This is a common issue with stone floors, and to re-assure myself and the client it could be resolved I cleaned a small area in the utility room with pleasing results!

Travertine Tiled Utility Floor Test Clean Leeds Village

This test clean helped me to understand which products and methods would work best on the floor and later that day I emailed over a detailed quote for the renovation. Happy with the quote I received a reply the same day asking when I could start.

Deep Cleaning Travertine Tiled Flooring

My colleague and I arrived on the agreed date and work started with adding protection to all areas that required it. We use a lot of water during the cleaning process and some materials such as MDF can become damaged with water ingress, so it makes sense to do this.

To get the floor clean, a coarse Carbide Brush fitted to a rotary machine was run over the Travertine tiles to scrub in a strong solution of Tile Doctor Pro-Clean. This process generates a lot of slurry as the dirt was washed out of the stone and grout which is extracted with a wet vacuum as we progressed.

Next it was on hands and knees with more Tile Doctor Pro-Clean and handheld brushes run over stubborn areas and along the grout lines to take them from 80% up to 100%.

Happy with the results, the next step was to renovate the stone using a series of diamond encrusted burnishing pads. Using only water for lubrication this process starts with the application of a coarse 400-grit burnishing pad attached to the floor buffer. This produces a lot of slurry which again was removed with a wet vacuum.

This left the Travertine clean, but the pores of the stone had been opened giving the floor a matt finish and more absorbent than it was originally. To further refine the appearance of the stone the next two burnishing pads were applied which are 800 and 1500-grit. These pads polish the stone and close the pores, restoring the natural sheen in the process. After each pad was applied the slurry was rinsed off the floor with water and extracted with the wet vacuum. Once complete the floor was left to dry off fully overnight.

Sealing a Travertine Tiled Utility, Kitchen, and WC

I arrived the next day and took several moisture readings from the floor to check that it had dried off sufficiently overnight. The results were good, so work moved onto sealing the Travertine with two coats of Tile Doctor Ultra Seal which is a natural look impregnating sealer. It works by soaking into the stone, occupying the pores and thereby preventing dirt from becoming ingrained there. This ensures dirt remains on the surface where it is easily cleaned away.

Travertine Tiled Floor During Sealing Leeds Village

The final step in the floor’s renovation was to apply the last of the diamond polishing pads which is a very fine 3000-grit. This pad further improves the polished appearance of the stone resulting in a satisfying sheen.

Travertine Tiled Kitchen Floor After Cleaning Sealing Leeds Village Travertine Tiled Utility Floor After Cleaning Sealing Leeds Village

The work made a massive difference to the floor, and I received an email the next day from one of the owners who was really pleased with the transformation:

”Floors look brilliant. Very pleased.”

Travertine Tiled Floor After Cleaning Sealing Leeds Village

For the care and maintenance of polished sealed floors I recommend the use of Tile Doctor’s Stone Soap which is a gentle but effective cleaning product that won’t impact the sealer and contains a patina enhancer. When it comes to sealed floors my mantra is:

“If you look after the sealer, the sealer will look after the floor!”


Professional Renovation and Polishing of a Travertine Tiled Floor in Kent

Large Travertine Floor Cleaned and Polished in Leeds Village Read More »

Terracotta Tiled Kitchen Floor Maintained in Faversham

Terracotta Tiled Floor Deep Cleaned and Sealed in Faversham

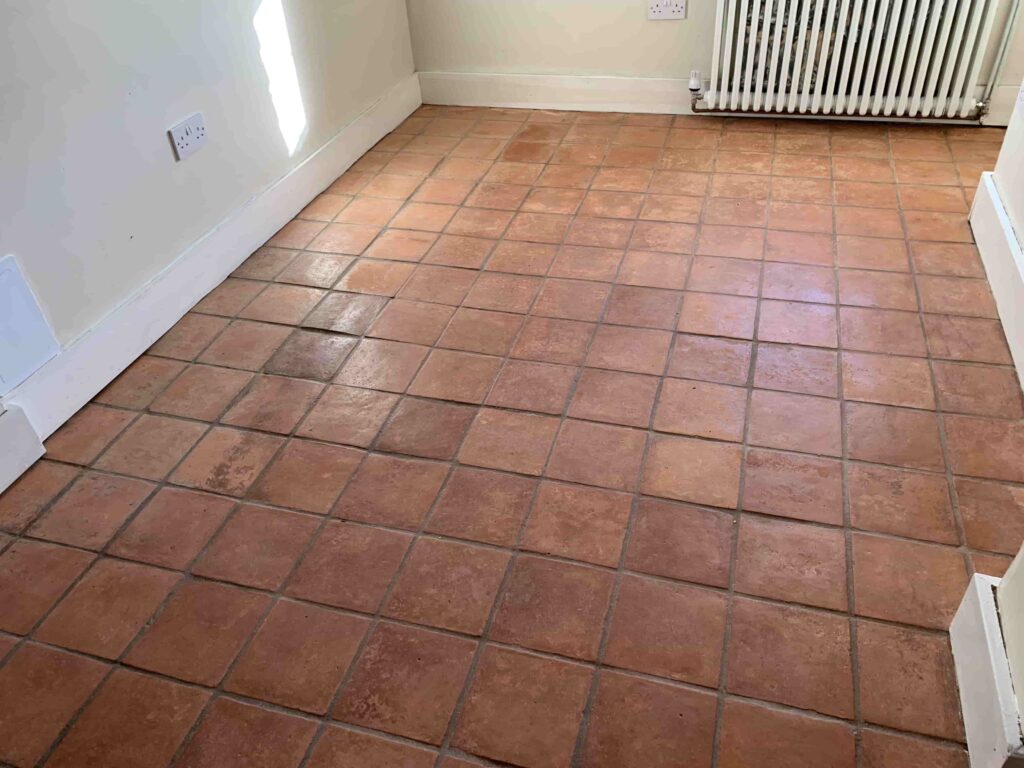
I was called to a rural area near Faversham where my clients owned a large old house with an expansive Terracotta floor that needed renovation. The house had been extended at some point and the whole lower floor was tiled with Terracotta which had previously been professionally deep cleaned and sealed some years prior by one of my Tile Doctor predecessors. As such, they were aware of the processes involved and had high expectations!

Terracotta Tiled Kitchen Floor Before Cleaning Faversham

Although the sealer had stood the test of time, it had now worn thin on the most heavily used areas of the floor. Those areas were now allowing dirt to become trapped in the pores of the tile, so it was now due another deep clean and reseal. I performed a survey, discussed which sealer options they preferred, and submitted my quote. With the quote accepted, the dates were agreed, and the products were ordered to be delivered to their property well ahead of my arrival.

Terracotta Tiled Kitchen Floor Before Cleaning Faversham Terracotta Tiled Kitchen Floor Before Cleaning Faversham

Cleaning a Terracotta Tiled Hallway Floor

Previously, this had been a three-day job, but I enlisted the help of a colleague for day one to help get the work done in two. Work started with the use of a carbide brush attached to a rotary buffer machine to work a strong dilution of Tile Doctor Pro-Clean into the floor. This is our go to Tile and Grout Cleaner which is safe to use on all types of hard floor.

This not only took most of the old sealer off, but as the bristles flexed, they also cleaned most of the wide grout lines. The muck and the slurry were extracted with a wet vacuum. The next stage was for the pair of us to get on our hands and knees with wire brushes and more Tile Doctor Pro-Clean to get the grout lines fully dirt-free. A black pad was then fitted to the buffer and the tiles were cleaned again, and the last vestiges of the sealer removed.

Next the floor was treated to an acid wash using Tile Doctor Grout Clean-Up which was mopped onto the floor. This further cleans up the tiles by removing any stubborn mineral deposits and grout smears, being acidic it also neutralises the pH level of the floor following the use of Tile Doctor Pro-Clean which is a strong alkaline. This was then rinsed off with water and extracted with the wet vacuum as before.

Terracotta is a very porous stone and given a lot of water had been applied during the cleaning process I was aware it could take some time for the tiles to dry. As a result, I left the floor to settle down and dry out for the following couple of days before I revisited to apply the sealer.

Sealing a Terracotta Tiled Kitchen Floor

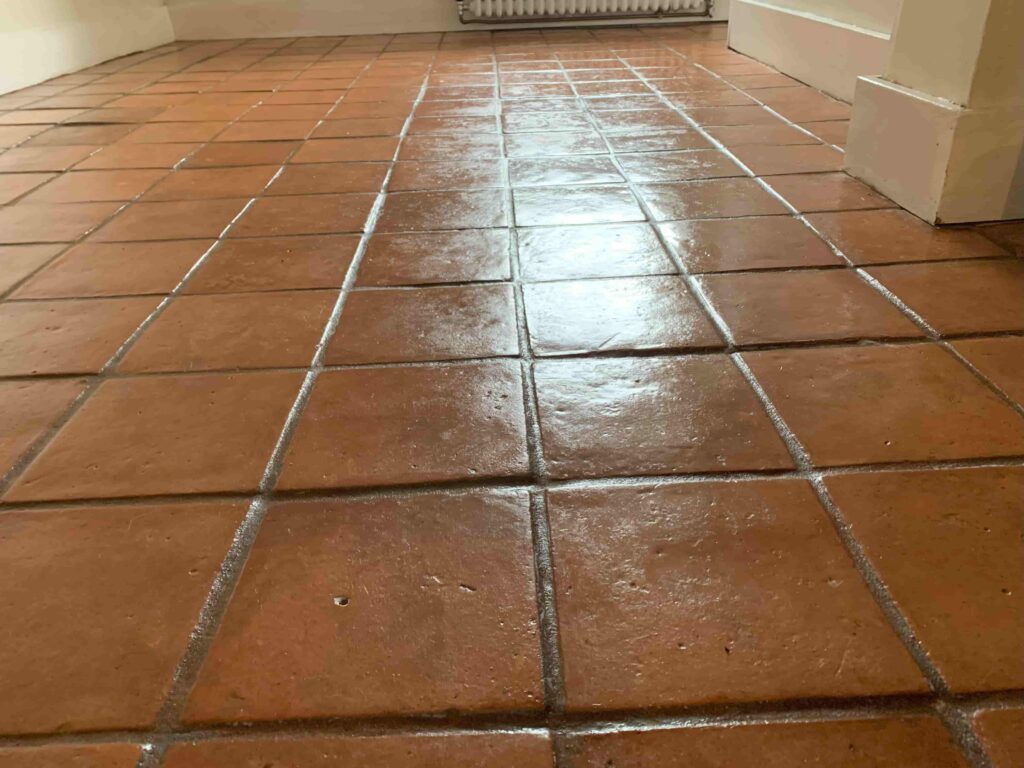
The couple had been very happy with the look of the last sealer and its durability. So, they opted to go for more of the same. The product used was Tile Doctor Seal and Go Extra which is a water-based sealer that results in an attractive low sheen finish. Three coats were needed to fully seal the Terracotta.

Terracotta Tiled Kitchen Floor After Cleaning Faversham

They were very happy with the results and that I had lived up to their expectations. The last thing to do was provide aftercare instruction on how to best look after the sealer with Tile Doctor’s Neutral pH Cleaner.

Terracotta Tiled Kitchen Floor After Cleaning Faversham


Professional Cleaning of a Terracotta Tiled Kitchen in North Kent

Terracotta Tiled Floor Deep Cleaned and Sealed in Faversham Read More »

Slate Kitchen Floor Tile Renovation Rochester Kent

Rejuvenating a Slate Tiled Kitchen Flooring in Rochester

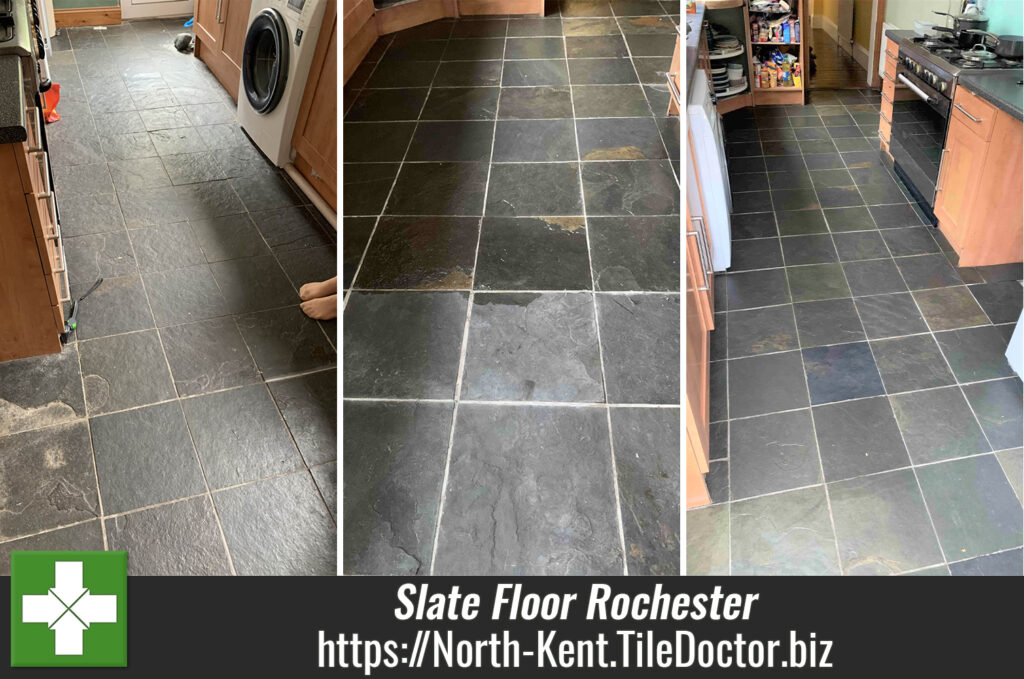
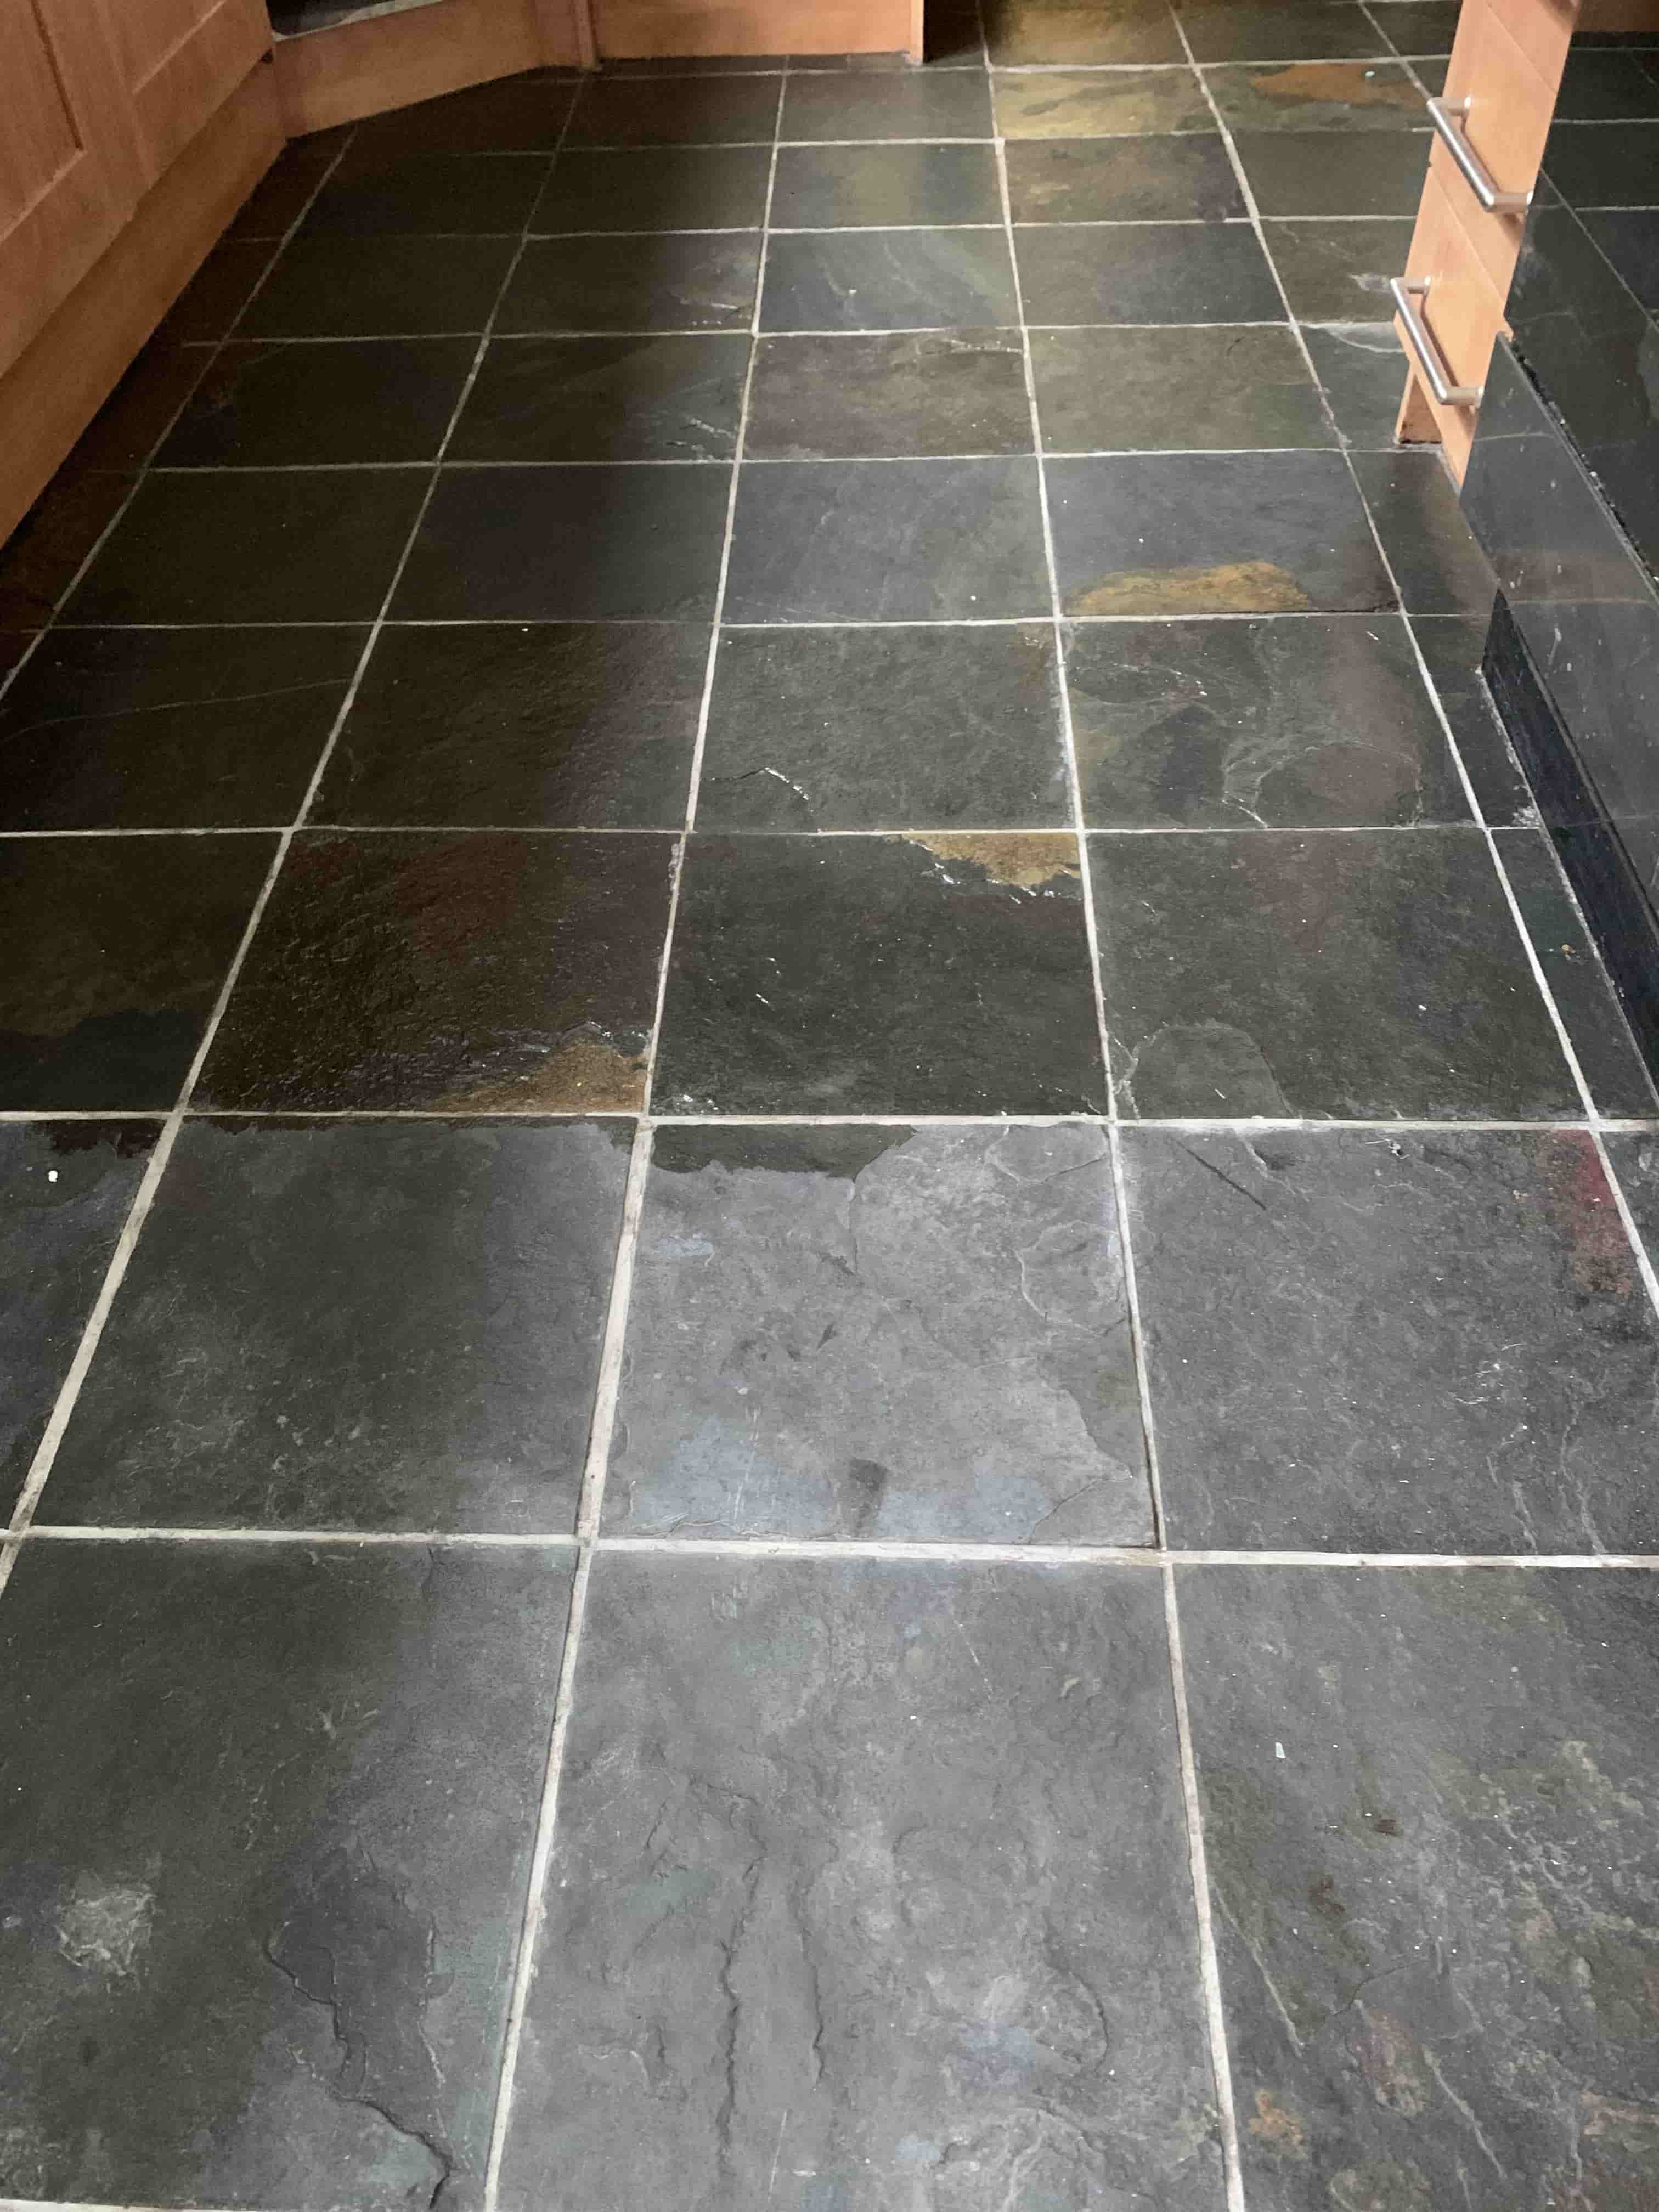
The photographs below are of Slate tiled Kitchen floor at a property in the historic Kent city of Rochester. It had been a while since the stone had been given a deep clean and seal, so the floor was looking tired and in need of rejuvenating. The occupants were unhappy with its appearance and wanted the life putting back into what was once an attractive floor to be proud of.

Grey Slate Kitchen Floor Before Cleaning Rochester

You can see from the photo above that the Slate tiles were looking dull and washed out, some areas had water staining and in places the grout was heavily stained. Kitchen floors do experience the most wear and of course being in a kitchen they can suffer from accidental spillages etc. Thankfully, we at Tile Doctor are perfectly equipped to deal with these issues so I was confident we could resolve all the problems and dramatically improve its appearance.

Cleaning a Brazilian Slate Tiled Floor

My first course of action was to focus on cleaning the Slate and Grout, the latter of which needed some serious attention. For this a created a strong solution of our reliable high-alkaline tile and grout cleaning product, Tile Doctor Pro-Clean. The solution was applied to the floor, left for ten minutes so it could get to work and then and agitated into the tile and grout using specialised grout brushes and a professional floor buffer fitted with a 17”, circular, nylon brush. This not only cleaned the tiles but also removed any old sealant remaining on the floor. The pads do struggle to reach into the recesses of the grout lines, so I followed up scrubbing the grout by hand using a wire brush and more Pro-Clean.

The floor was rinsed with water and the resulting slurry was quickly extracted using a wet vacuum. The floor was then given an acid wash using a weak dilution of Tile Doctor Grout Clean-Up. This product is made from concentrated phosphoric acid and is great for removing grout smears and salts from the tile and grout ensuring there’s nothing that can detract from the natural appearance of the stone. Giving the floor an acid rinse also ensures a better bond with the sealer.

The floor was given a final rinse and mop with plain water to neutralise the tile and grout after remove any trace of cleaning product. This was followed up with the wet vacuum ensuring the floor was as dry as it could be by the end of the first day.

Grey Slate Kitchen Floor During Cleaning Rochester

Sealing a Slate Tiled Kitchen Floor

I then left the floor to dry off overnight and returned the next day to apply a fresh sealer that will protect the stone from ingrained dirt and improve its appearance. The floor has to be dry before applying the sealer, so I checked first with a moisture meter on various parts of the floor to be sure.

Happy the floor was dry I started with the application of Tile Doctor X-Tra Seal which is a very modern product oil-based resin formula that provides strong water and stain repellency, ideal for a kitchen. X-Tra Seal has a low sheen finish and contains a colour enhancer that puts the black back into the tiles.

Grey Slate Kitchen Floor After Cleaning Rochester

Once complete the Grout was clean and the Slate was given a new lease of life with its original vigour restored. And of course, the occupants now had a Kitchen floor they could be proud of!


Professional Renovation of a Slate Tiled Floor in Kent

Rejuvenating a Slate Tiled Kitchen Flooring in Rochester Read More »

Scroll to Top