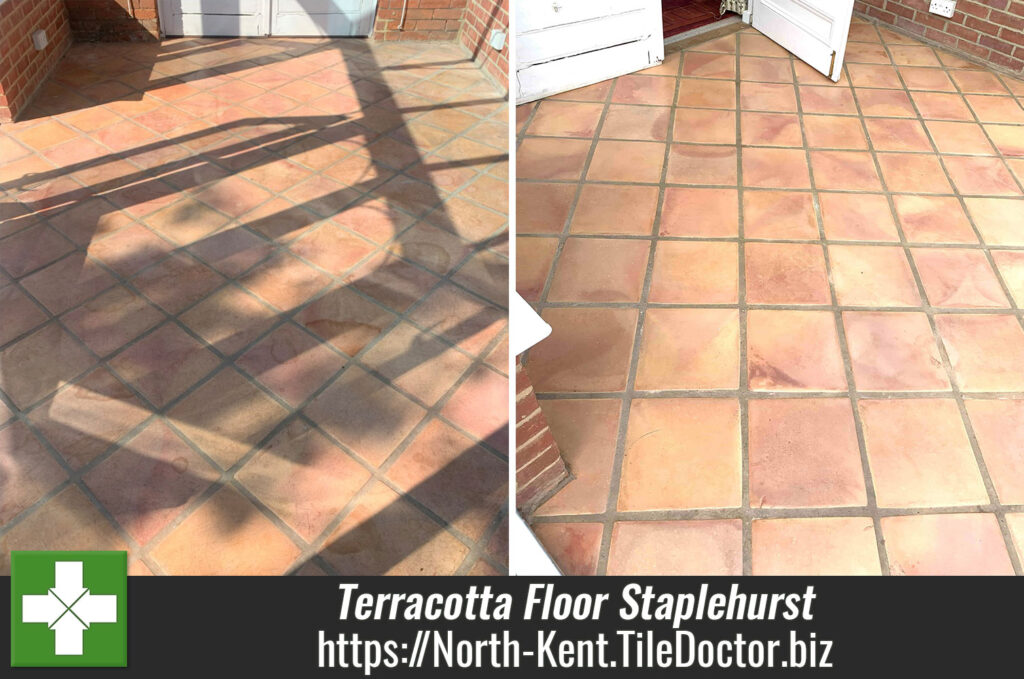
Terracotta Tiled Conservatory Floor Cleaned and Sealed in Staplehurst
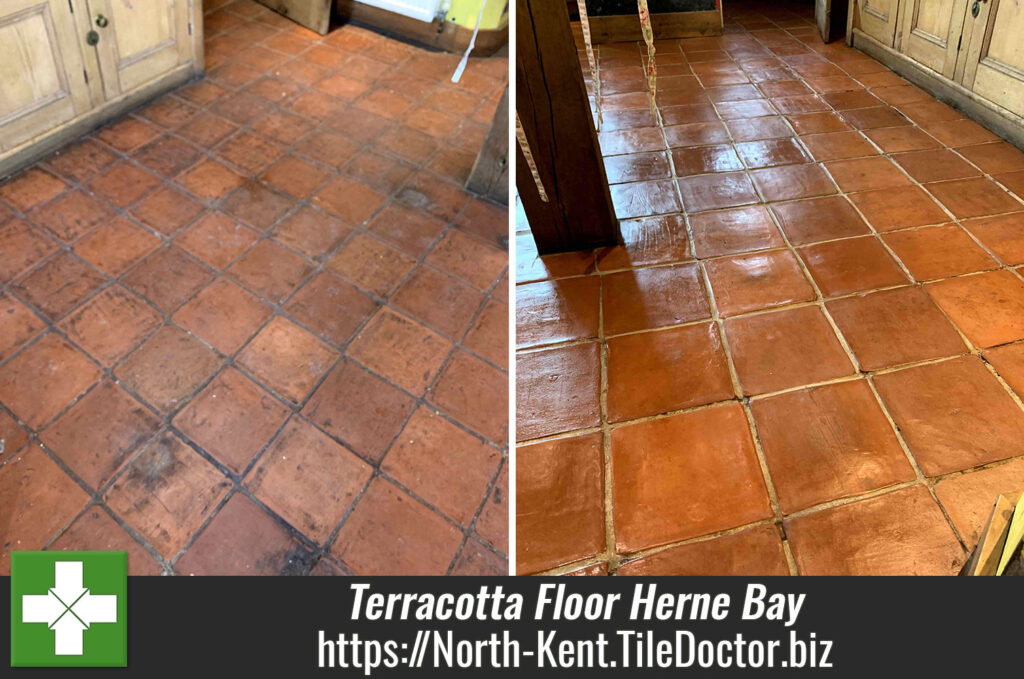
This Terracotta tiled floor was installed in the 11m2 Conservatory of a property near Staplehurst. The owner was unhappy with the water staining that was spoiling the appearance of the tiles and decided it was time to have the Terracotta cleaned and resealed.
I went over to survey the floor and provide a quote for the work. I could see that tiles were in good physical condition however Terracotta is very absorbent and it was clear that any sealer present on the floor was now failing making it difficult to clean and therefore mark free.

As part of the survey, I ran a test clean on part of the floor ed a tile as a test and the results looked good. I left, asking the owners to wait until the tile had dried fully to let me know the result. The next day, the report was that the tile had improved significantly and they were keen to progress pending a quote. I duly submitted a quote that they agreed upon and the work was scheduled in.

Knowing how much water would be absorbed into the Terracotta during the cleaning process this was always going to be a two-day job, one day to clean and then when dry one day to seal.
Cleaning a Terracotta Tiled Conservatory Floor
Upon arrival, the owners had kindly removed all furniture and opened all the windows, this was much appreciated as the temperature that day was due to approach 29 degrees Celsius!
First job was to clean the floor with a generous dilution of Tile Doctor Pro-Clean, which is a strong alkaline tile cleaner that’s safe to use on all types of tile and stone. The Pro-Clean was left to soak in for ten minutes to give it time to breakdown the dirt and any remaining sealing. The floor was then scrubbed with a Black scrubbing pad fitted to a rotary buffer to loosen the dirt and bring it to the surface where it could be extracted with a wet vacuum.
The floor was then inspected and Remove and Go used to spot clean several paint splashes on the tiles left over from decorating. I then turned my attention to the grout which needed further attention. The pads can struggle to reach into the recesses of the grout lines so I find it more effective to get on my hands and knees and scrub these by hand with a wire brush and more Pro Clean.

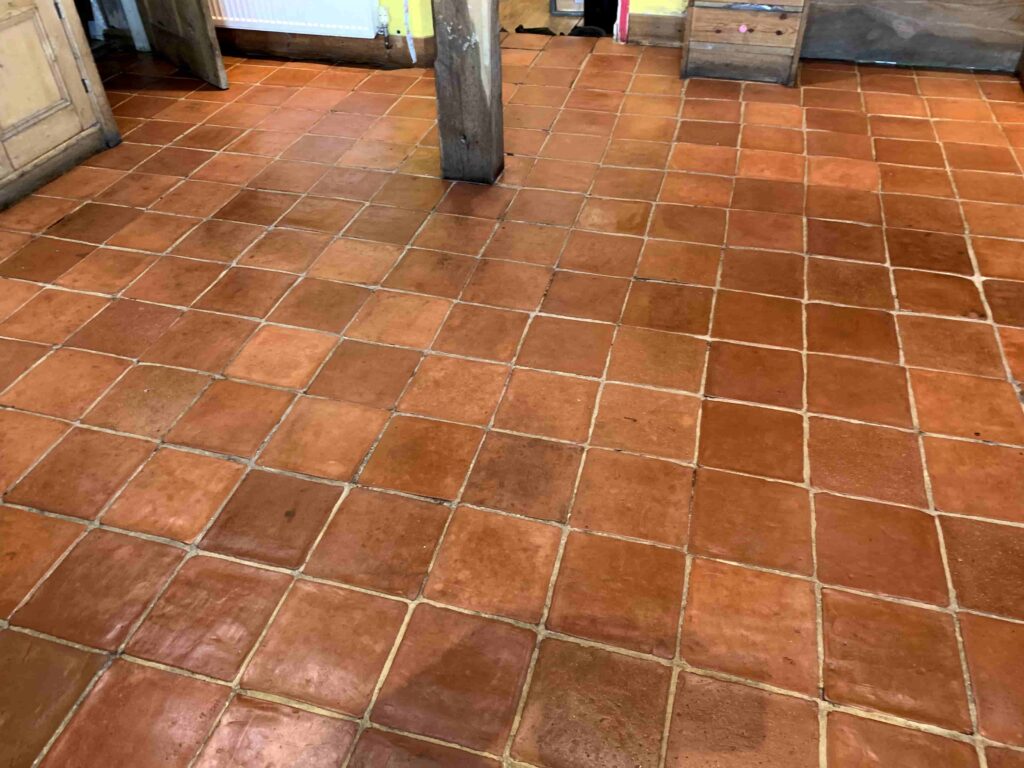
During the inspection of the floor, I noticed some areas were stained with White efflorescent salts which were spot treated with a solution of Grout Clean-Up. The acid in this product dissolves the salts and the residue was sponged off. Finally, I rinsed the floor in stages, replacing the water every 10-12 tiles and extracted with a wet vacuum. I repeated this process 2 more times to make sure any trace of cleaning product had been removed.

Even with the heat and the glass, the tiles would not dry out that day and having gone as far as I could, I called it a day.
Sealing a Terracotta Tiled Conservatory Floor
I left it three days before returning to seal the floor; the tiles were certainly dry enough to seal but unfortunately the gallons of water had used during the cleaning process had resulted in more efflorescence salts being deposited on surface as it dried out.
To counter this the affected areas were given an acid rinse using more Grout Clean-up which was brushed in and then rinsed off and extracted with the wet vacuum. I then ran some errands and sat in the van doing some follow-up whilst waiting for the affected tiles to dry out.
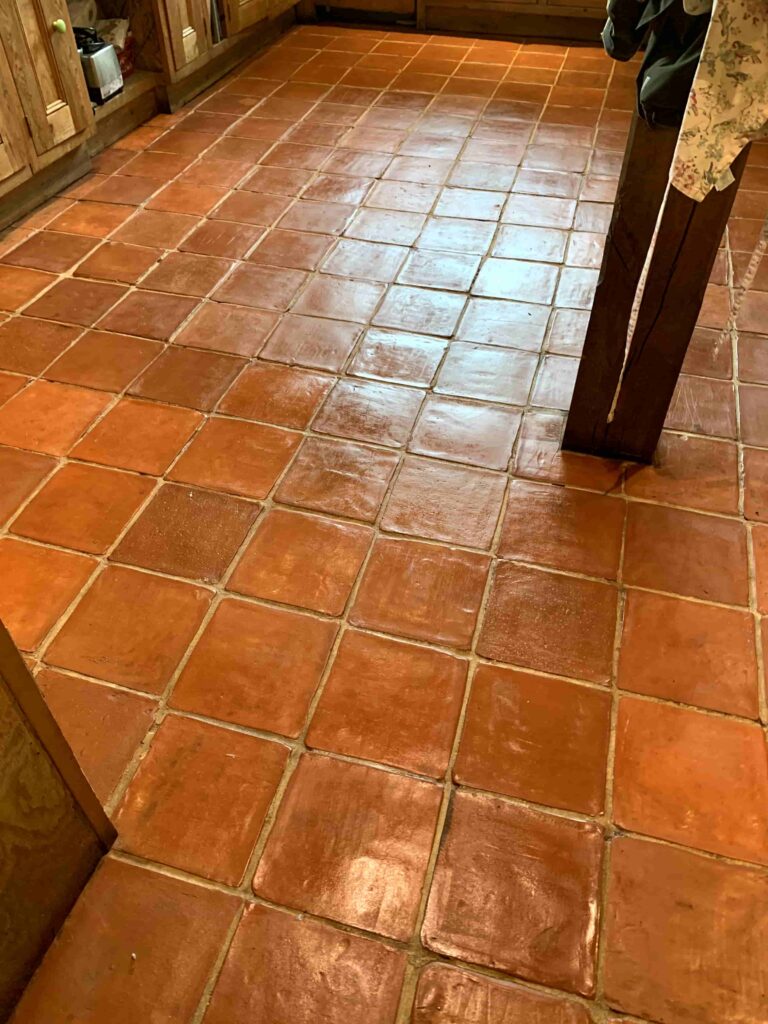
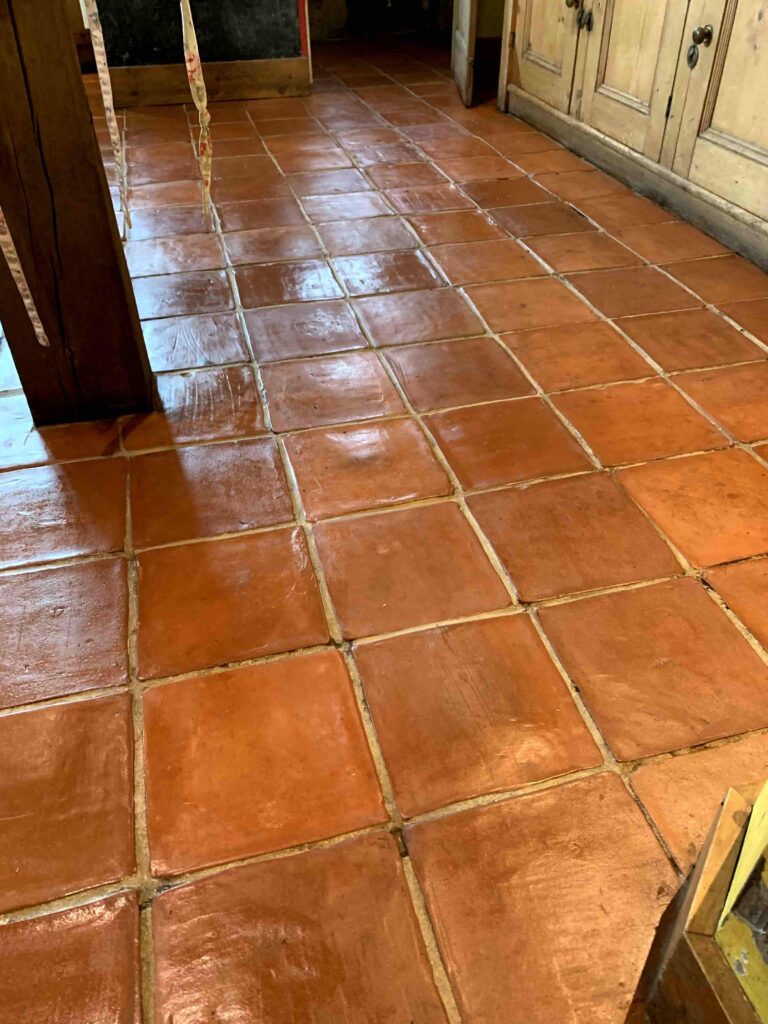
With agreement from the owners, we had opted to use Tile Doctor Seal and Go Extra to seal the Terracotta. This is a modern acrylic breathable sealer that leaves a nice low sheen finish on the tiles, additionally it has a built-in colour intensifier that will help highlight the unique patterns in each tile. Three coats were needed and mercifully, the day was cooler making the job so much easier! The new sealer will ensure dirt remains on the surface of the tile where it is easily cleaned away with regular cleaning.

Despite the sun and shadows coming through the conservatory glass, I think you can see from the photos how the stains were removed and a lovely finish was achieved! The last thing to do was provide aftercare instruction on how to best look after the sealer with Tile Doctor’s Neutral pH Cleaner which is a gentle yet effective product for cleaning sealed tiles.

Professional Cleaning of a Terracotta Tiled Conservatory in North Kent
Terracotta Tiled Conservatory Floor Cleaned and Sealed in Staplehurst Read More »