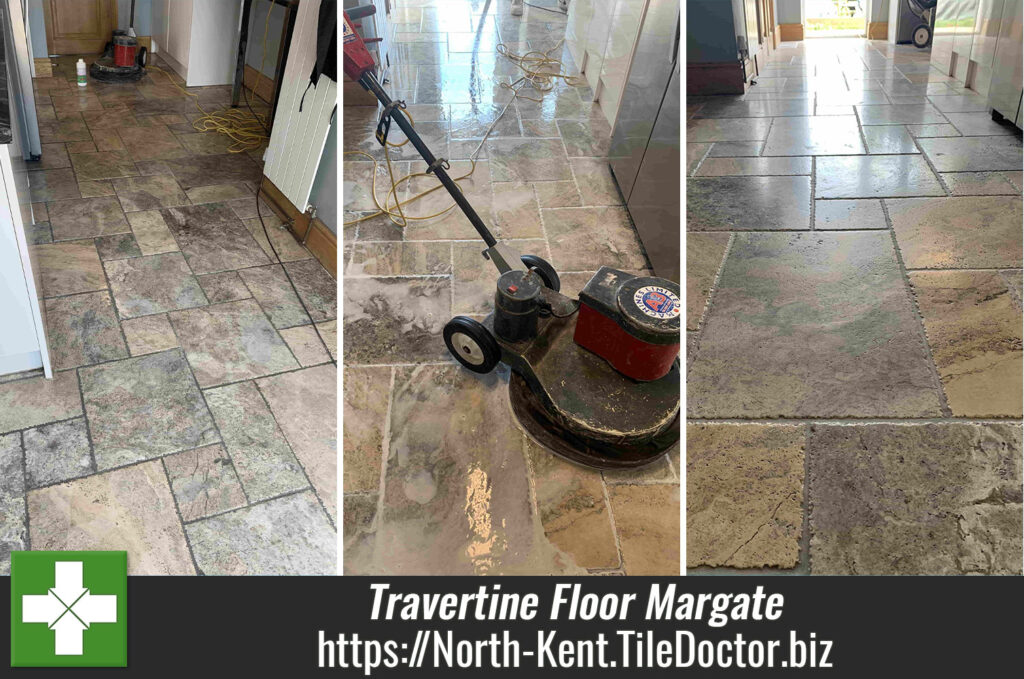
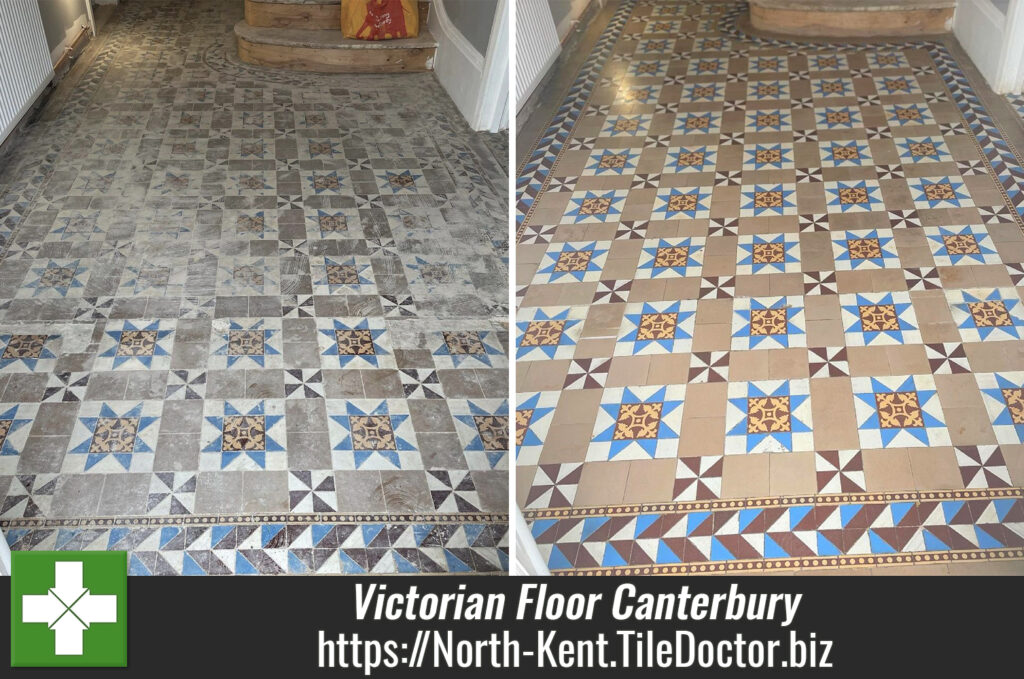
Blue Travertine Tiled Kitchen Floor Renovated in Sandwich
This client from Sandwich had a Blue Travertine floor in their kitchen which is not as common as its ‘Yellow’ cousin but certainly more interesting to look it. It does however have the same maintenance requirements and unless the sealer is maintained will trap dirt. This happens very gradually over many years until one day you look down at the floor and think, ‘How did that happen?!’

I visited the property to conduct a free survey of the floor and assured the client that the appearance of their unique Blue Travertine floor could be restored with a deep clean, polish and fresh sealer. I explained the renovation plan and the costs involved which they were happy to accept and a date agreed for the work to start.
Cleaning a Travertine Tiled Kitchen and Utility Floor
On day 1 work started with cleaning the grout lines using Tile Doctor Pro-Clean which is a strong industrial strength alkaline cleaner. Its applied to the grout lines, left to soak in for a while and then scrubbed in using a stiff brush by hand. This process lifts the dirt from the grout line into the solution and then extracted from the surface using a wet vacuum.
Next, a 400-grit diamond burnishing pad was applied to the stone floor with using water for lubrication. This is the first step in the honing and polishing process that will remove the ingrained dirt and restore the polished appearance of the Travertine. This was followed by the 800 and then 1500 grit burnishing pads, slowly cleaning and re-building the polish. In between each pad the soiling was extracted with the wet vacuum.

Once done, it was as far as we could do for the day and we left, allowing the tiles to dry overnight.
Sealing a Travertine Tiled Kitchen and Utility Floor
Returning the next morning work began by checking the moisture readings of the floor using a damp meter. The readings were good and it confirmed the floor was dry and ready for sealing. This check is really important as applying a sealer to a damp floor would impact its ability to cure and result in it looking patchy.
Before applying the sealer, I ran a very fine 3000-grit burnishing pad over the floor to further bring up its polished appearance. This is applied with a small amount of water sprayed onto the tile using a process know as a Spray Burnish. This really finishes off the honing process and by now the floor had a good sheen to it.
The sealer of choice was Tile Doctor’s Ultra Seal a natural look, impregnator that soaks into the pores of the tile protecting it from with and without altering the natural appearance of the honed stone. Two coats were applied and a final buff with a White pad left the kitchen floor looking like you could eat your dinner off it!

My client was very happy with their difference I had made to the Blue Travertine tiles which really looked like they had just been installed.
Before leaving I took time to discuss aftercare cleaning which for a polished stone floor like this, I recommend the use of Tile Doctor Stone Soap which is a gentle cleaning product that won’t impact the sealer and will maintain the patina.
Professional Restoration of a Blue Travertine Tiled Kitchen Floor in Kent
Blue Travertine Tiled Kitchen Floor Renovated in Sandwich Read More »