Grout Clean-up

Terracotta Tiled Conservatory Floor Renovation Staplehurst

Terracotta Tiled Conservatory Floor Cleaned and Sealed in Staplehurst

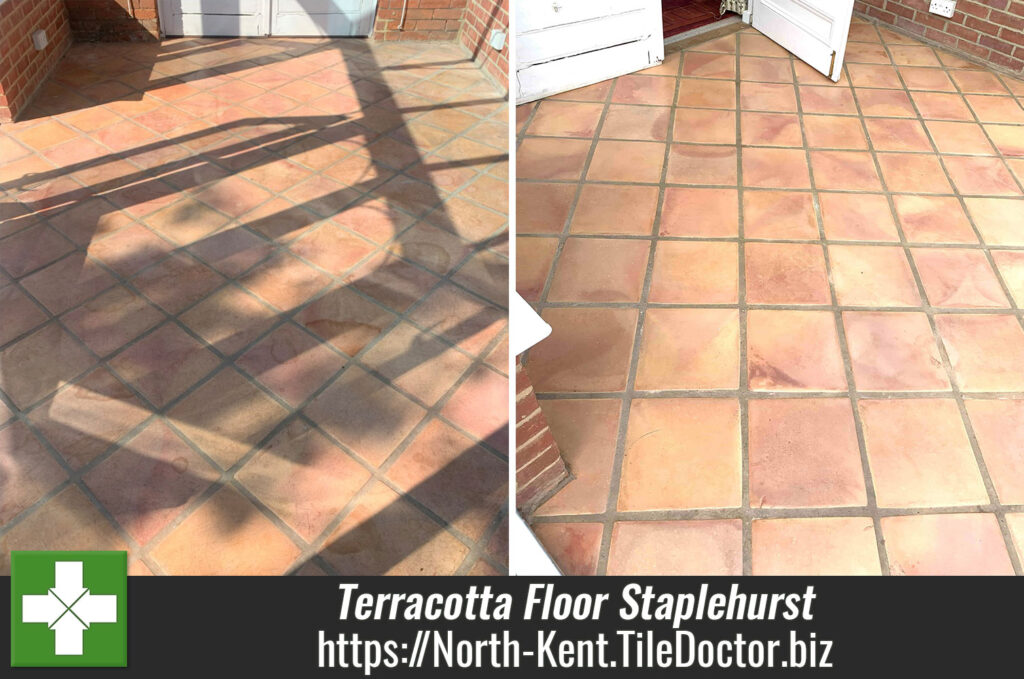
This Terracotta tiled floor was installed in the 11m2 Conservatory of a property near Staplehurst. The owner was unhappy with the water staining that was spoiling the appearance of the tiles and decided it was time to have the Terracotta cleaned and resealed.

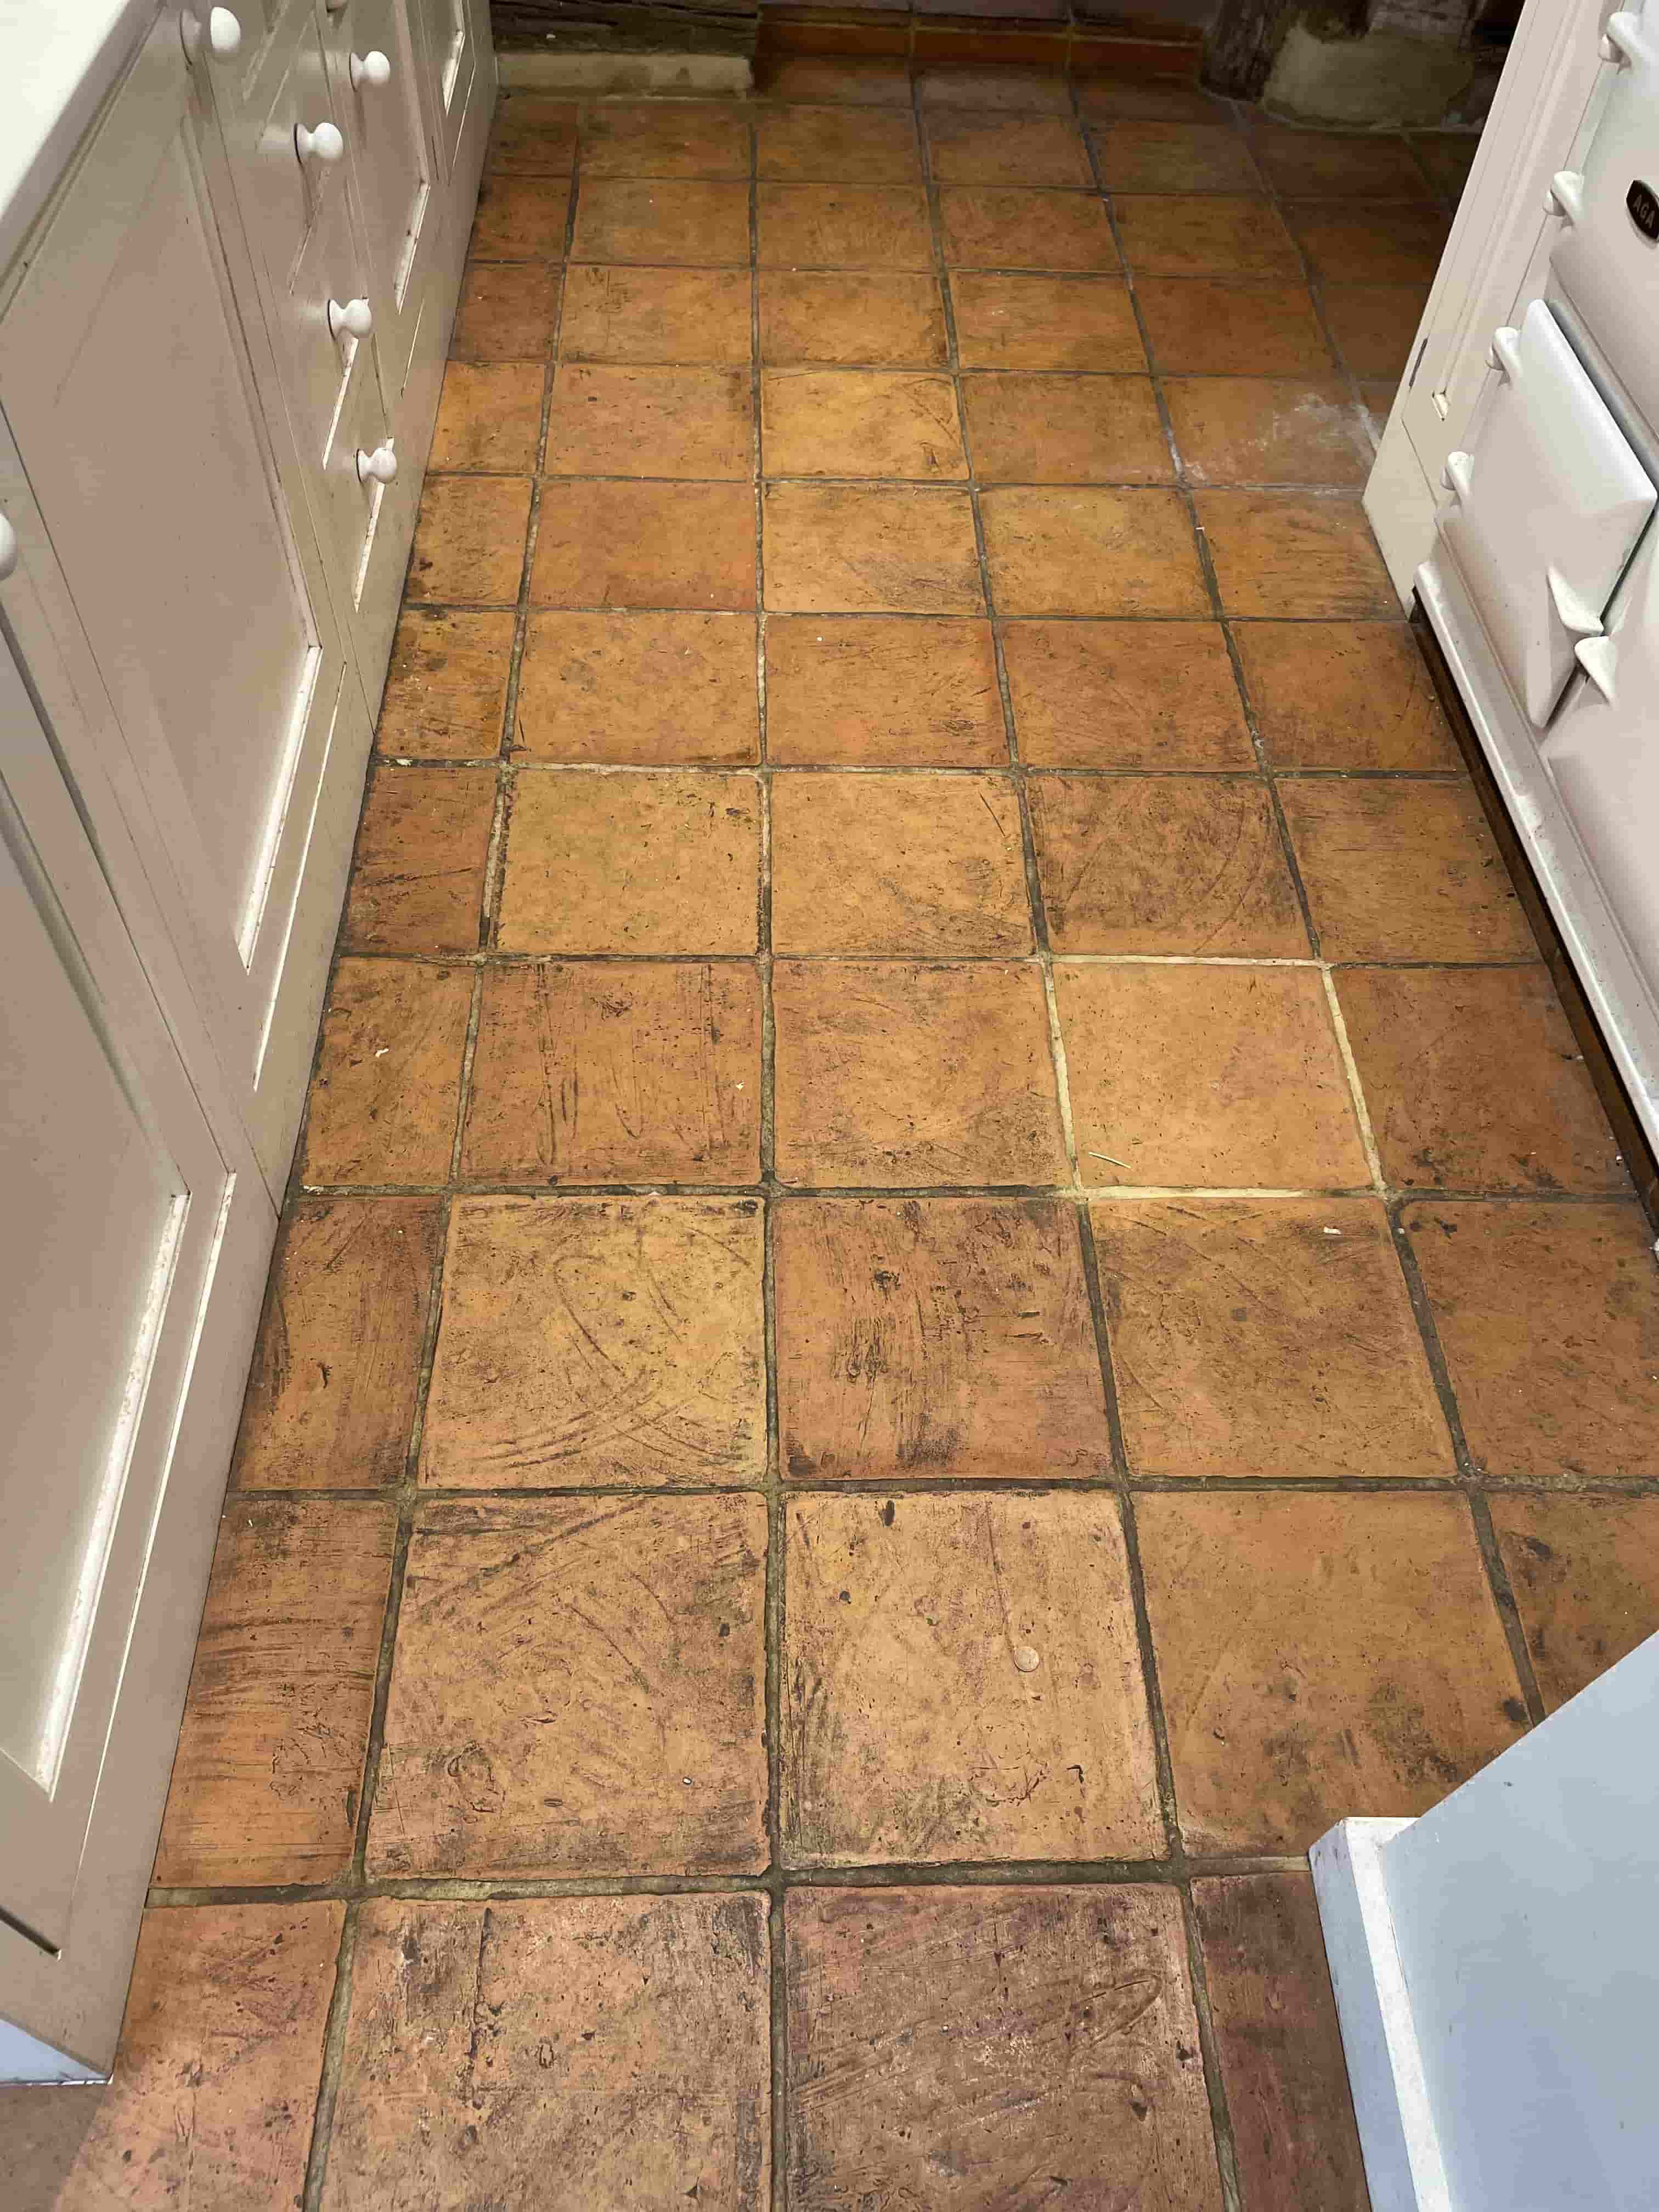
I went over to survey the floor and provide a quote for the work. I could see that tiles were in good physical condition however Terracotta is very absorbent and it was clear that any sealer present on the floor was now failing making it difficult to clean and therefore mark free.
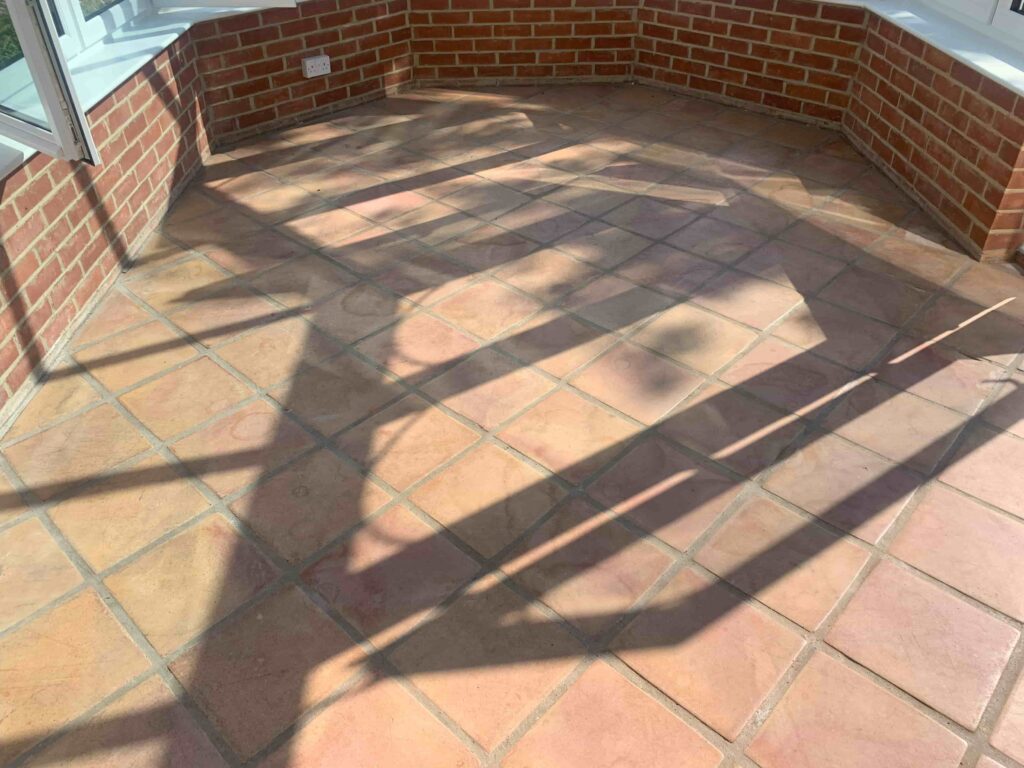
Terracotta Tiled Conservatory Floor Before Cleaning Staplehurst

As part of the survey, I ran a test clean on part of the floor ed a tile as a test and the results looked good. I left, asking the owners to wait until the tile had dried fully to let me know the result. The next day, the report was that the tile had improved significantly and they were keen to progress pending a quote. I duly submitted a quote that they agreed upon and the work was scheduled in.
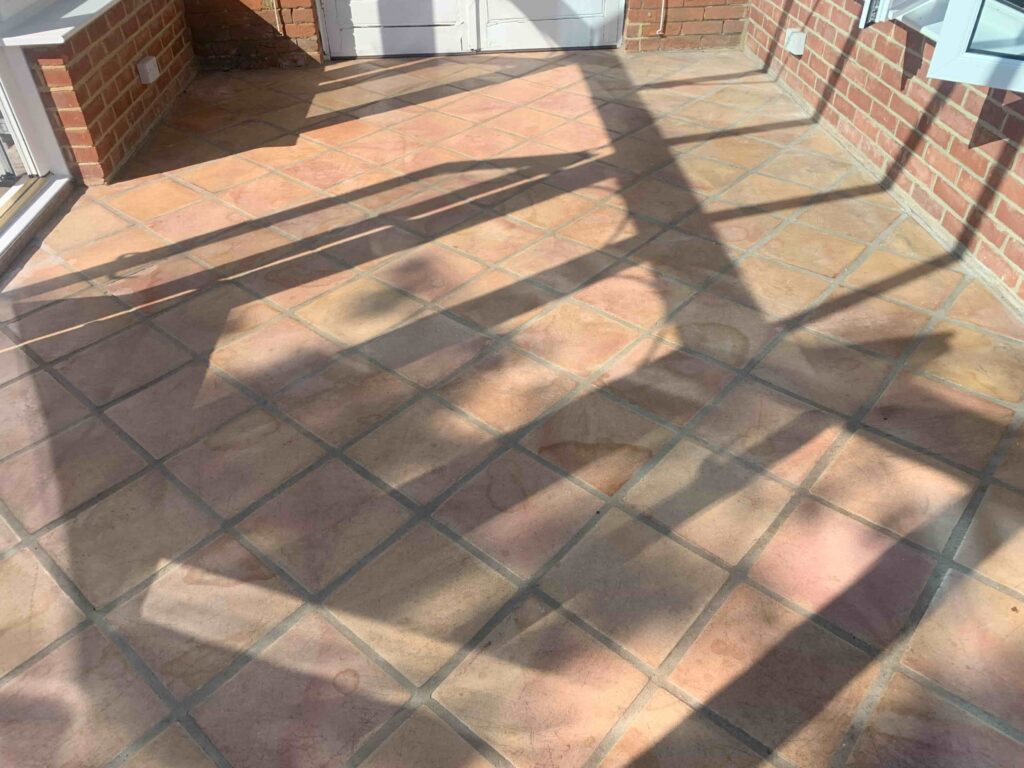
Terracotta Tiled Conservatory Floor Before Cleaning Staplehurst

Knowing how much water would be absorbed into the Terracotta during the cleaning process this was always going to be a two-day job, one day to clean and then when dry one day to seal.

Cleaning a Terracotta Tiled Conservatory Floor

Upon arrival, the owners had kindly removed all furniture and opened all the windows, this was much appreciated as the temperature that day was due to approach 29 degrees Celsius!

First job was to clean the floor with a generous dilution of Tile Doctor Pro-Clean, which is a strong alkaline tile cleaner that’s safe to use on all types of tile and stone. The Pro-Clean was left to soak in for ten minutes to give it time to breakdown the dirt and any remaining sealing. The floor was then scrubbed with a Black scrubbing pad fitted to a rotary buffer to loosen the dirt and bring it to the surface where it could be extracted with a wet vacuum.

The floor was then inspected and Remove and Go used to spot clean several paint splashes on the tiles left over from decorating. I then turned my attention to the grout which needed further attention. The pads can struggle to reach into the recesses of the grout lines so I find it more effective to get on my hands and knees and scrub these by hand with a wire brush and more Pro Clean.
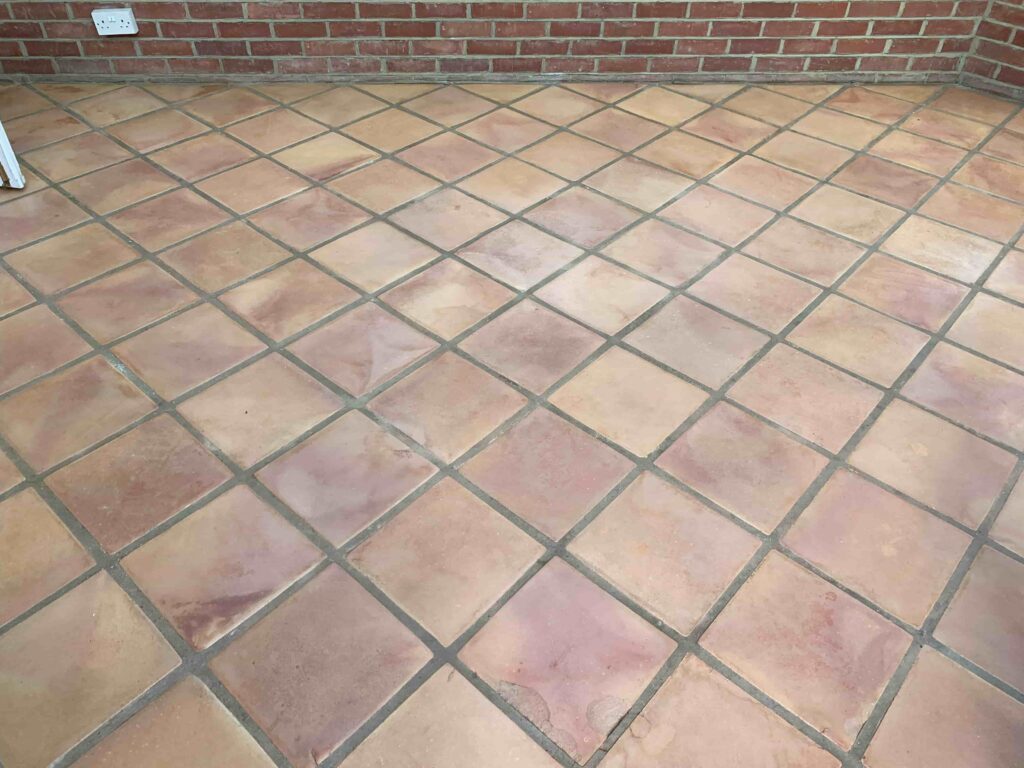
Terracotta Tiled Conservatory Floor During Cleaning Staplehurst

During the inspection of the floor, I noticed some areas were stained with White efflorescent salts which were spot treated with a solution of Grout Clean-Up. The acid in this product dissolves the salts and the residue was sponged off. Finally, I rinsed the floor in stages, replacing the water every 10-12 tiles and extracted with a wet vacuum. I repeated this process 2 more times to make sure any trace of cleaning product had been removed.

Terracotta Tiled Conservatory Floor Before Cleaning Staplehurst

Even with the heat and the glass, the tiles would not dry out that day and having gone as far as I could, I called it a day.

Sealing a Terracotta Tiled Conservatory Floor

I left it three days before returning to seal the floor; the tiles were certainly dry enough to seal but unfortunately the gallons of water had used during the cleaning process had resulted in more efflorescence salts being deposited on surface as it dried out.

To counter this the affected areas were given an acid rinse using more Grout Clean-up which was brushed in and then rinsed off and extracted with the wet vacuum. I then ran some errands and sat in the van doing some follow-up whilst waiting for the affected tiles to dry out.

With agreement from the owners, we had opted to use Tile Doctor Seal and Go Extra to seal the Terracotta. This is a modern acrylic breathable sealer that leaves a nice low sheen finish on the tiles, additionally it has a built-in colour intensifier that will help highlight the unique patterns in each tile. Three coats were needed and mercifully, the day was cooler making the job so much easier! The new sealer will ensure dirt remains on the surface of the tile where it is easily cleaned away with regular cleaning.
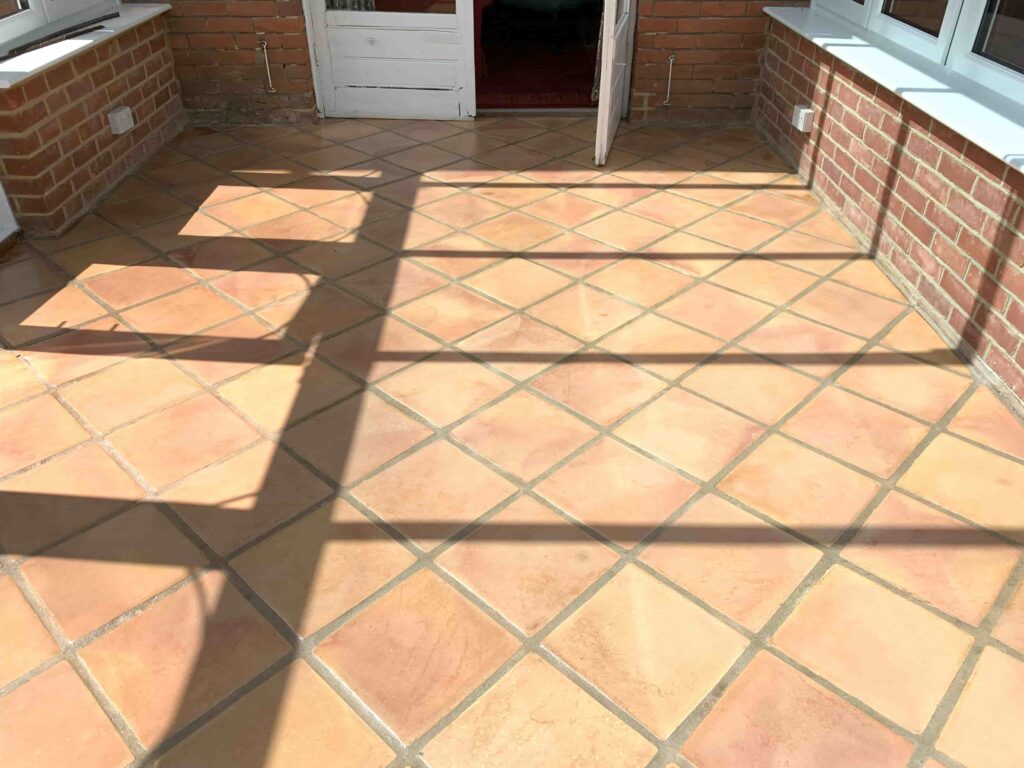
Terracotta Tiled Conservatory Floor After Cleaning Staplehurst

Despite the sun and shadows coming through the conservatory glass, I think you can see from the photos how the stains were removed and a lovely finish was achieved! The last thing to do was provide aftercare instruction on how to best look after the sealer with Tile Doctor’s Neutral pH Cleaner which is a gentle yet effective product for cleaning sealed tiles.
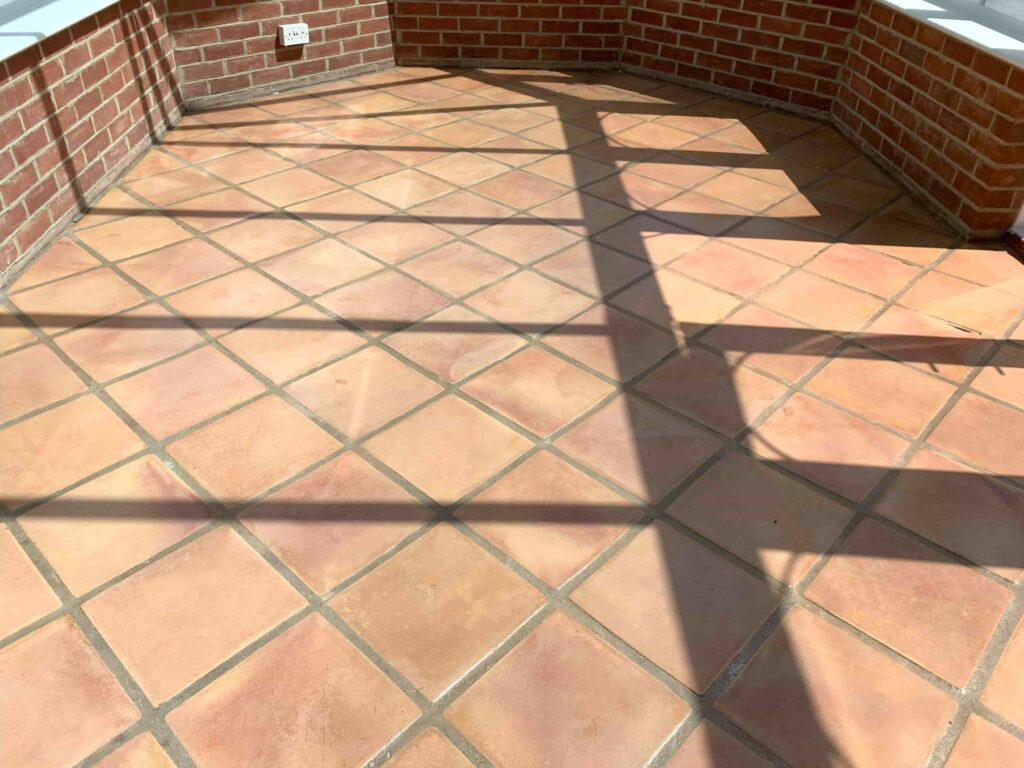
Terracotta Tiled Conservatory Floor After Cleaning Staplehurst


Professional Cleaning of a Terracotta Tiled Conservatory in North Kent

Terracotta Tiled Conservatory Floor Cleaned and Sealed in Staplehurst Read More »

Red Black Victorian Tiled Floor Restoration Edenbridge

100 Year Old Red and Black Victorian Tiled Floor Restored in Edenbridge

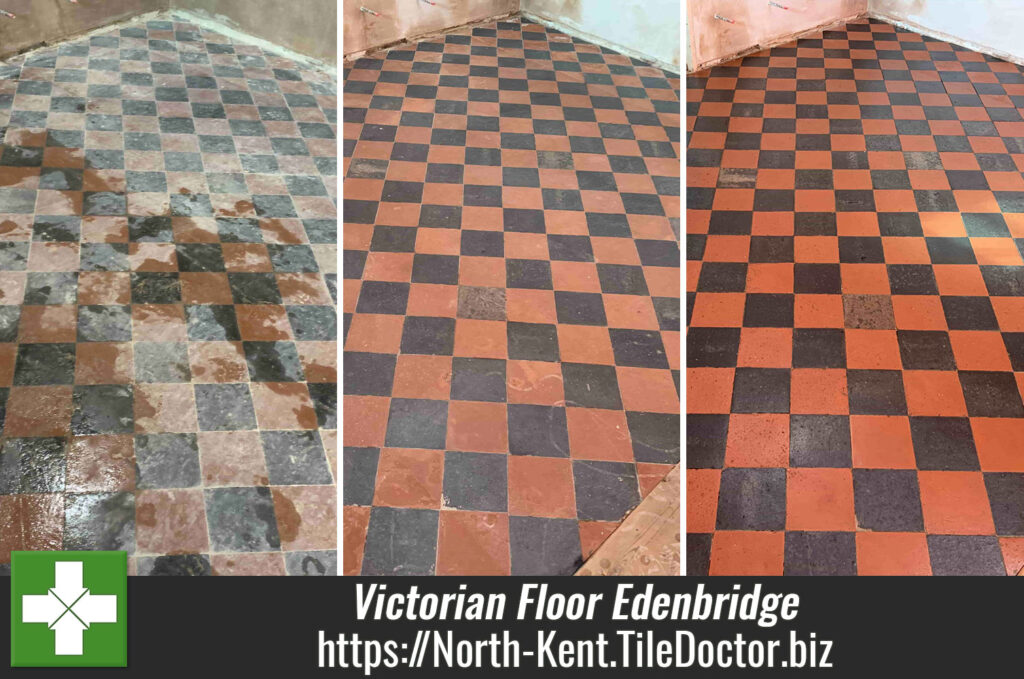
I was recently asked to renovate a Red and Black Tiled floor at a Victorian era house near Edenbridge. The property had recently been purchased and the new owner was performing a complete makeover before he and his wife moved in.

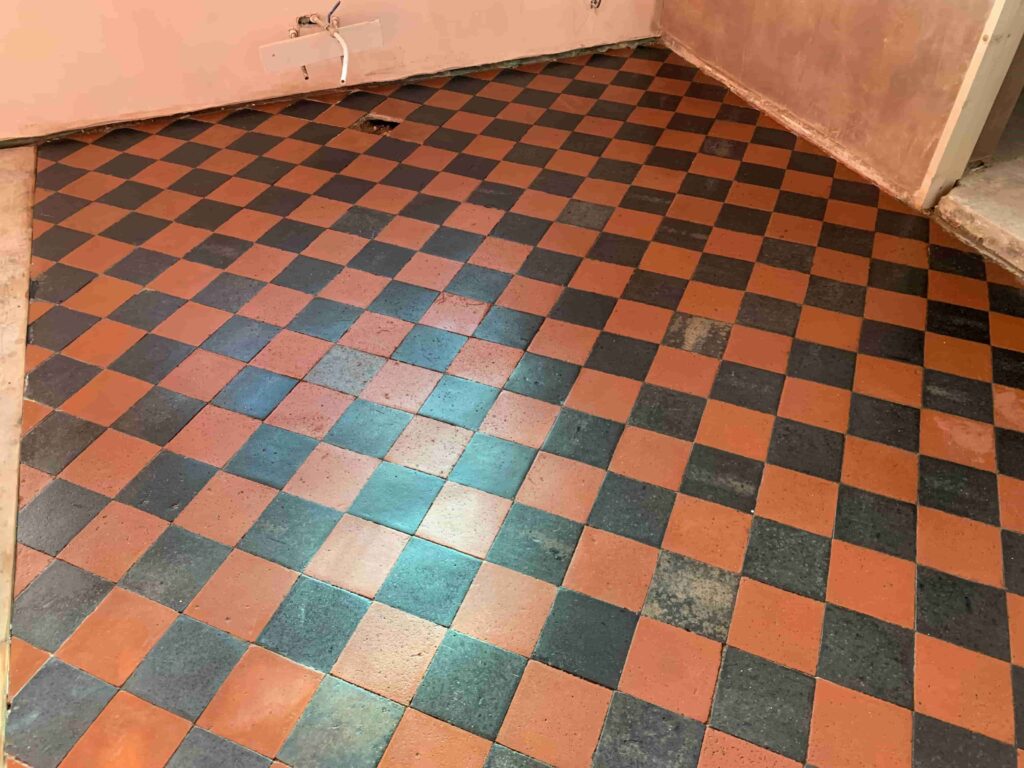
Red Black Victorian Tiled Floor Before Cleaning Edenbridge

The tiled floor in question in the building site was to be the Kitchen floor. It was a heavily soiled however the good news was that the tiles themselves were in good physical condition. They were thick tiles at approximately 18mm deep and this undoubtedly contributed to them withstanding the rigours of time. I worked out a comprehensive price for the restoration, submitted the quote and was awarded the work.

Red Black Victorian Tiled Floor Before Cleaning Edenbridge

Deep Cleaning a Red and Black Victorian Tiled Floor

This was a two-day job and the first day was all about the clean. Upon arrival, and fearing drying issues, I organised for heaters and a dehumidifier to be supplied. Old floors like these don’t have the benefit of a damp proof membrane under the floor so can take much longer to dry out.

With plenty of water and a strong solution of Tile Doctor Pro-Clean, a powerful alkaline cleaner, I worked them in with a Carbide brush attached to the big buffer. This gave a good initial clean and the brush was able to flex into the pits of the 100-year-old worn tiles. The resultant slurry was removed with a wet vacuum as I went. Then, it was a hands and knees job with the rotary with a smaller brush attachment to get right up to the edges and into the corners.

Red Black Victorian Tiled Floor During Cleaning Edenbridge

The floor has some remnants of cement remaining which I removed with a chisel as I went along. I then changed the brush attachment on the big buffer for a 400-grit burnishing pad and repeated the process, giving the floor a 2nd treatment, followed by hands and knees and a six-inch version of the same pad.

Another issue I had to deal with were old paint marks which were spot treated with Tile Doctor Remove and Go. The last thing to do was neutralise the alkalinity of the floor after using Pro-Clean with an acid wash using Tile Doctor Grout Clean-Up. This was mopped onto the floor and then rinsed off.

Normally, with newer floors, I would return the next day to seal the tiles but given my concerns over the floor conditions and thickness of the tiles, I felt more time was needed. The tiles needed to fully dry with the aid of the heaters and dehumidifier.

Sealing a 100-Year-Old Victorian Tiled Floor

Two days later, I returned and took damp readings from several areas using a moisture meter. This showed the tiles were dry enough but my more immediate issue was the prolific efflorescence that had appeared. Efflorescence can occur when wet tiles dry and soluble salts come to the surface as a white foam and dry as a White salt.

Red Black Victorian Tiled Floor During Efflorescence Cleaning Edenbridge

I consider this to be a good thing, as if it is going to happen then you want it to happen on your terms. i.e. before the sealing process starts. A very hot bucket of water and a wrung-out mop with another dose of Grout Clean-Up shifted the efflorescence and left the floor to dry for a while to allow the tiles to dry again.

Later, more moisture tests proved the floor was ready to be sealed and I was able to make a start on sealing the tiles. For this type of tile and situation, my strong preference is Tile Doctor’s X-Tra Seal, an oil-based, impregnator sealer which is formulated with a colour intensifier. Additionally, this sealer is fully breathable so any moisture will rise through the tile and evaporate at the surface un-hindered. I applied one liberal coat, allowed it to soak in and buffed off the excess with a White pad and allowed the floor to dry once again.

I then returned to apply a very thin second layer and buffed that off, too. The colour intensifier ensured that the black became blacker and red tiles a deeper red resulting in a very satisfying finish!

Red Black Victorian Tiled Floor After Cleaning Edenbridge

With the job done, I left the premises having texted the owner photos of the finished floor. Later, I got the following response:

“Just went and had a look. Really pleased with it thanks.”

For aftercare cleaning of Victorian tiles I recommend the use of Neutral Tile Cleaner which is designed for the maintenance of sealed floor tiles.

Red Black Victorian Tiled Floor After Cleaning Edenbridge


Professional Cleaning of a Victorian Tiled Floor in North Kent

100 Year Old Red and Black Victorian Tiled Floor Restored in Edenbridge Read More »

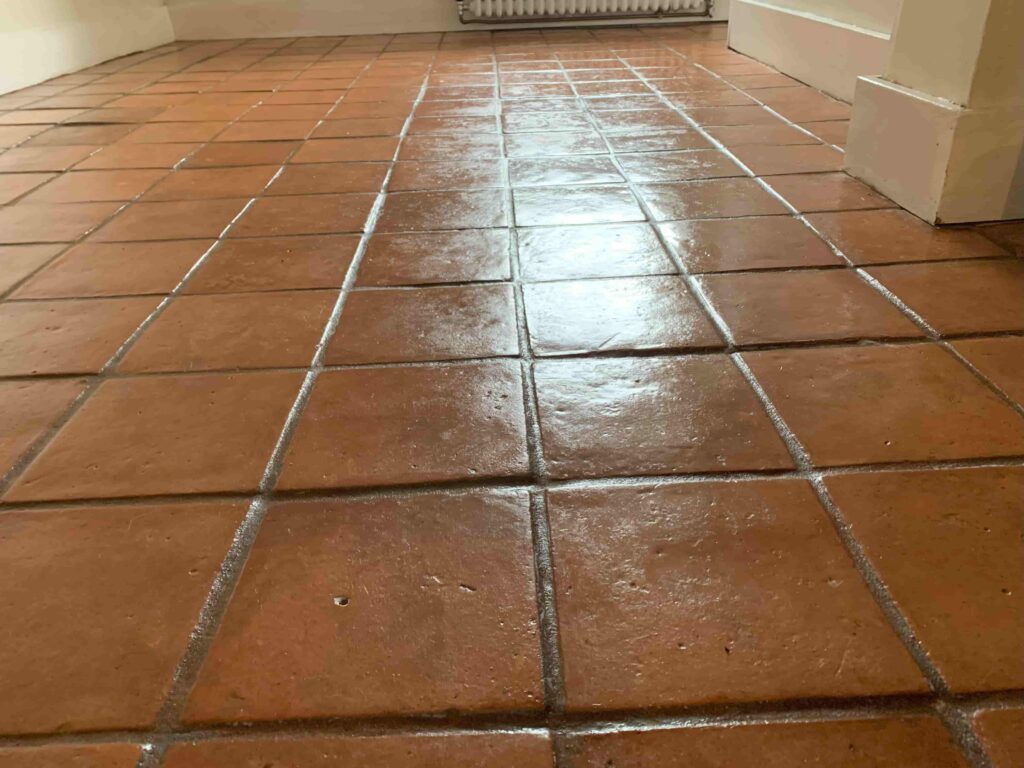
Terracotta Tiled Kitchen Floor Maintained in Faversham

Terracotta Tiled Floor Deep Cleaned and Sealed in Faversham

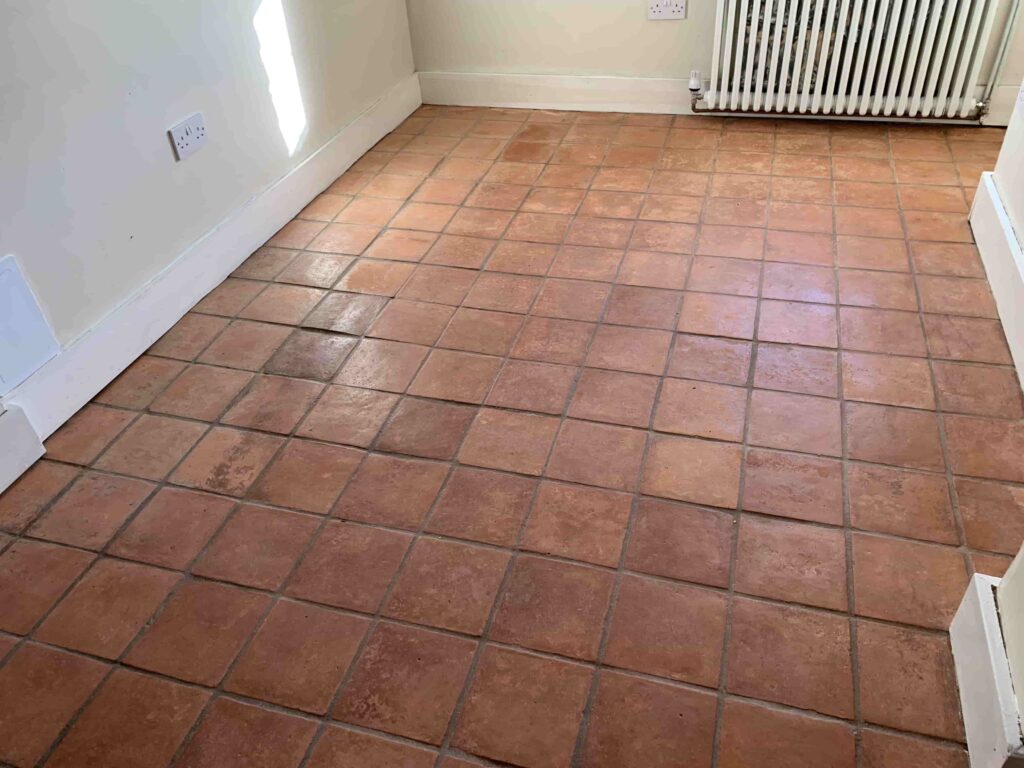
I was called to a rural area near Faversham where my clients owned a large old house with an expansive Terracotta floor that needed renovation. The house had been extended at some point and the whole lower floor was tiled with Terracotta which had previously been professionally deep cleaned and sealed some years prior by one of my Tile Doctor predecessors. As such, they were aware of the processes involved and had high expectations!

Terracotta Tiled Kitchen Floor Before Cleaning Faversham

Although the sealer had stood the test of time, it had now worn thin on the most heavily used areas of the floor. Those areas were now allowing dirt to become trapped in the pores of the tile, so it was now due another deep clean and reseal. I performed a survey, discussed which sealer options they preferred, and submitted my quote. With the quote accepted, the dates were agreed, and the products were ordered to be delivered to their property well ahead of my arrival.

Terracotta Tiled Kitchen Floor Before Cleaning Faversham Terracotta Tiled Kitchen Floor Before Cleaning Faversham

Cleaning a Terracotta Tiled Hallway Floor

Previously, this had been a three-day job, but I enlisted the help of a colleague for day one to help get the work done in two. Work started with the use of a carbide brush attached to a rotary buffer machine to work a strong dilution of Tile Doctor Pro-Clean into the floor. This is our go to Tile and Grout Cleaner which is safe to use on all types of hard floor.

This not only took most of the old sealer off, but as the bristles flexed, they also cleaned most of the wide grout lines. The muck and the slurry were extracted with a wet vacuum. The next stage was for the pair of us to get on our hands and knees with wire brushes and more Tile Doctor Pro-Clean to get the grout lines fully dirt-free. A black pad was then fitted to the buffer and the tiles were cleaned again, and the last vestiges of the sealer removed.

Next the floor was treated to an acid wash using Tile Doctor Grout Clean-Up which was mopped onto the floor. This further cleans up the tiles by removing any stubborn mineral deposits and grout smears, being acidic it also neutralises the pH level of the floor following the use of Tile Doctor Pro-Clean which is a strong alkaline. This was then rinsed off with water and extracted with the wet vacuum as before.

Terracotta is a very porous stone and given a lot of water had been applied during the cleaning process I was aware it could take some time for the tiles to dry. As a result, I left the floor to settle down and dry out for the following couple of days before I revisited to apply the sealer.

Sealing a Terracotta Tiled Kitchen Floor

The couple had been very happy with the look of the last sealer and its durability. So, they opted to go for more of the same. The product used was Tile Doctor Seal and Go Extra which is a water-based sealer that results in an attractive low sheen finish. Three coats were needed to fully seal the Terracotta.

Terracotta Tiled Kitchen Floor After Cleaning Faversham

They were very happy with the results and that I had lived up to their expectations. The last thing to do was provide aftercare instruction on how to best look after the sealer with Tile Doctor’s Neutral pH Cleaner.

Terracotta Tiled Kitchen Floor After Cleaning Faversham


Professional Cleaning of a Terracotta Tiled Kitchen in North Kent

Terracotta Tiled Floor Deep Cleaned and Sealed in Faversham Read More »

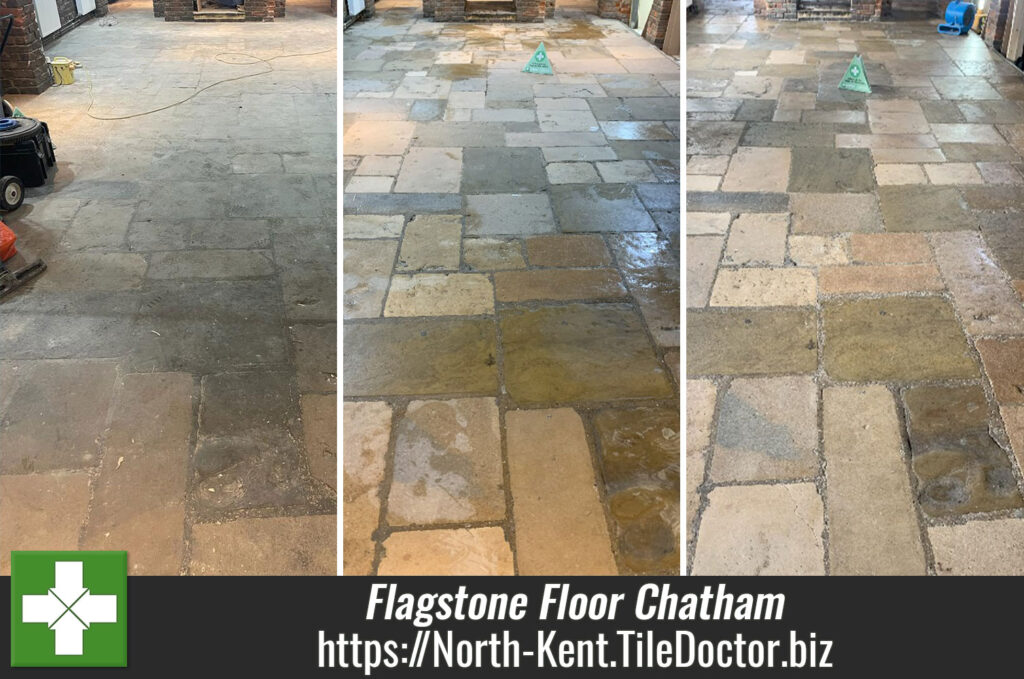
Flagstone Basement Pub Floor After Renovation Chatham

Renovating a Flagstone Floor at an 18th Century Public House in Chatham

I received a request to quote for renovating a large flagstone floor in the basement of Command House pub in Chatham. The company that engaged us had been performing a major refit of the Grade II listed building and the basement was next in line for renovation.

The building dates to the 18th century and being part of the famous Chatham Dockyard had a long military history and was no doubt visited by Lord Nelson. At some point in the 20th century, it was converted into a public house. The 70sqm basement was to be a feature of the pub but the flagstone floor had been neglected for seemingly most of its life and we were tasked with getting the best out of it that it could offer.

Flagstone Basement Pub Floor Before Cleaning Chatham Flagstone Basement Pub Floor Before Cleaning Chatham

Having inspected the floor I conducted a few cleaning tests and provided a quotation for its renovation which would include a deep cleaning of the flagstones and mortar and sealing with a hard-wearing sealer. Happy with my quote I was asked to go ahead with the work and a date set to start the renovation.

Flagstone Basement Pub Floor Before Cleaning Chatham

Cleaning a Neglected Flagstone Basement Floor in Chatham

Work started with the application of a strong dilution of Tile Doctor Pro-Clean which is our go to alkaline Tile and Grout cleaner. This was left to soak in for ten minutes before being worked in using a set of diamond encrusted burnishing pads fitted to a weighed floor buffer.

Flagstone Basement Pub Floor During Cleaning Chatham Flagstone Basement Pub Floor During Cleaning Chatham

You start with a coarse 400-grit pad lubricating with water as the pad is passed over each part of the stone floor three to four times, the soiling is then rinsed off the floor and extracted with a wet vacuum and you move onto the next pad in the sequence i.e., 800, then 1500 grit. Due to the rough nature of the flagstone and the sheer size of the basement meant that 4 sets of pads were needed to loosen and remove the years of dirt.

Last step of the cleaning phase was to give the stone an acid wash using a weak dilution of Tile Doctor Grout Clean-Up. This was done to neutralise the pH level of the floor after the use of the alkaline cleaner, it will also counter any efflorescent salts lurking in the stone which can be a problem with old floors like this that were laid without a damp proof membrane.

It took two of us working together a full day to complete the cleaning but by the end of the day the whole floor was cleaned and prepped for the next step which would involve applying a sealer to the stone. Happy with our progress, we left for the day for the floor to settle and dry for the sealing process.

Sealing a Flagstone Basement Floor in Chatham

Upon our return, we performed multiple point moisture tests around the basement. A lot of water had been used in the cleaning process and we were conscious that we were below ground and very near the Medway River.

Happy that all was in order, work proceeded to seal the floor with Tile Doctor X-Tra Seal which is a hard-wearing oil-based sealer that puts the life back in the stone. This sealer is known as an impregnator which works by soaking into the pores of the stone occupying the space and preventing dirt from residing there in future. This product it is also a breathable sealer that can be used externally and so more than capable of dealing with any damp issues which may occur later.

Flagstone Basement Pub Floor After Renovation Chatham

It was a very satisfying job as the colours that came through from the once very grey and lifeless floor really gave the room a new perspective. It will be interesting to see what they do next with it.

Flagstone Basement Pub Floor After Renovation Chatham


Professional Renovation of an Old Flagstone Basement Floor in Kent

Renovating a Flagstone Floor at an 18th Century Public House in Chatham Read More »

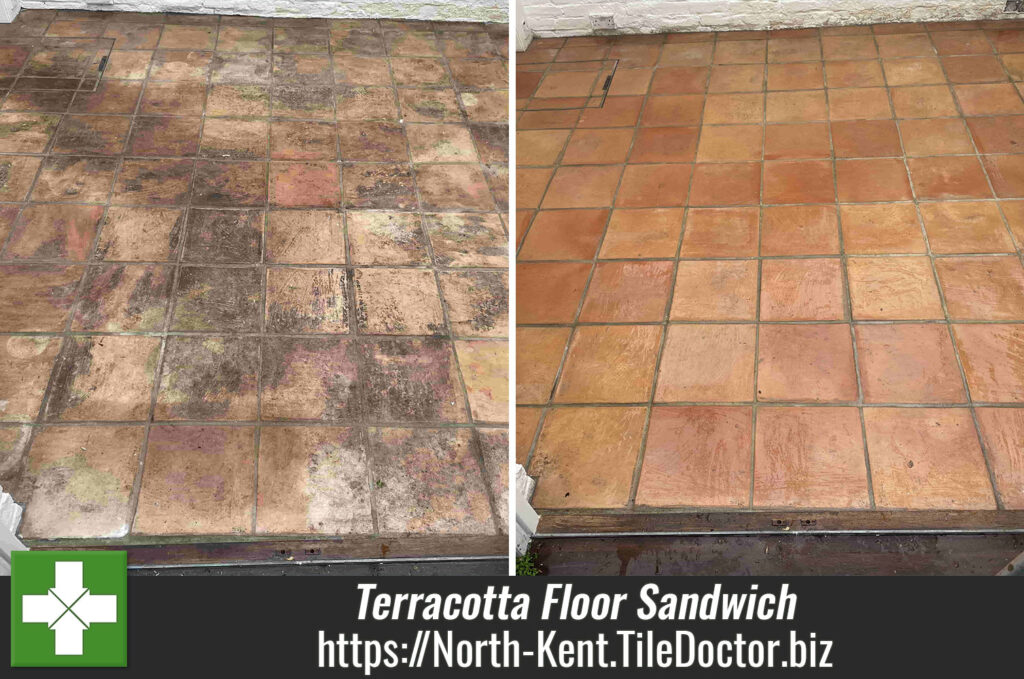
Terracotta Floor Restoration Sandwich

Dirty Terracotta Floor Deep Cleaned and Sealed in Sandwich

I was called to a property in Sandwich, which is a few miles south of Margate, to look at renovating the Terracotta flooring in the kitchen, dining room and conservatory. The house was originally three cottages and close to the end of a project to convert them into one property.

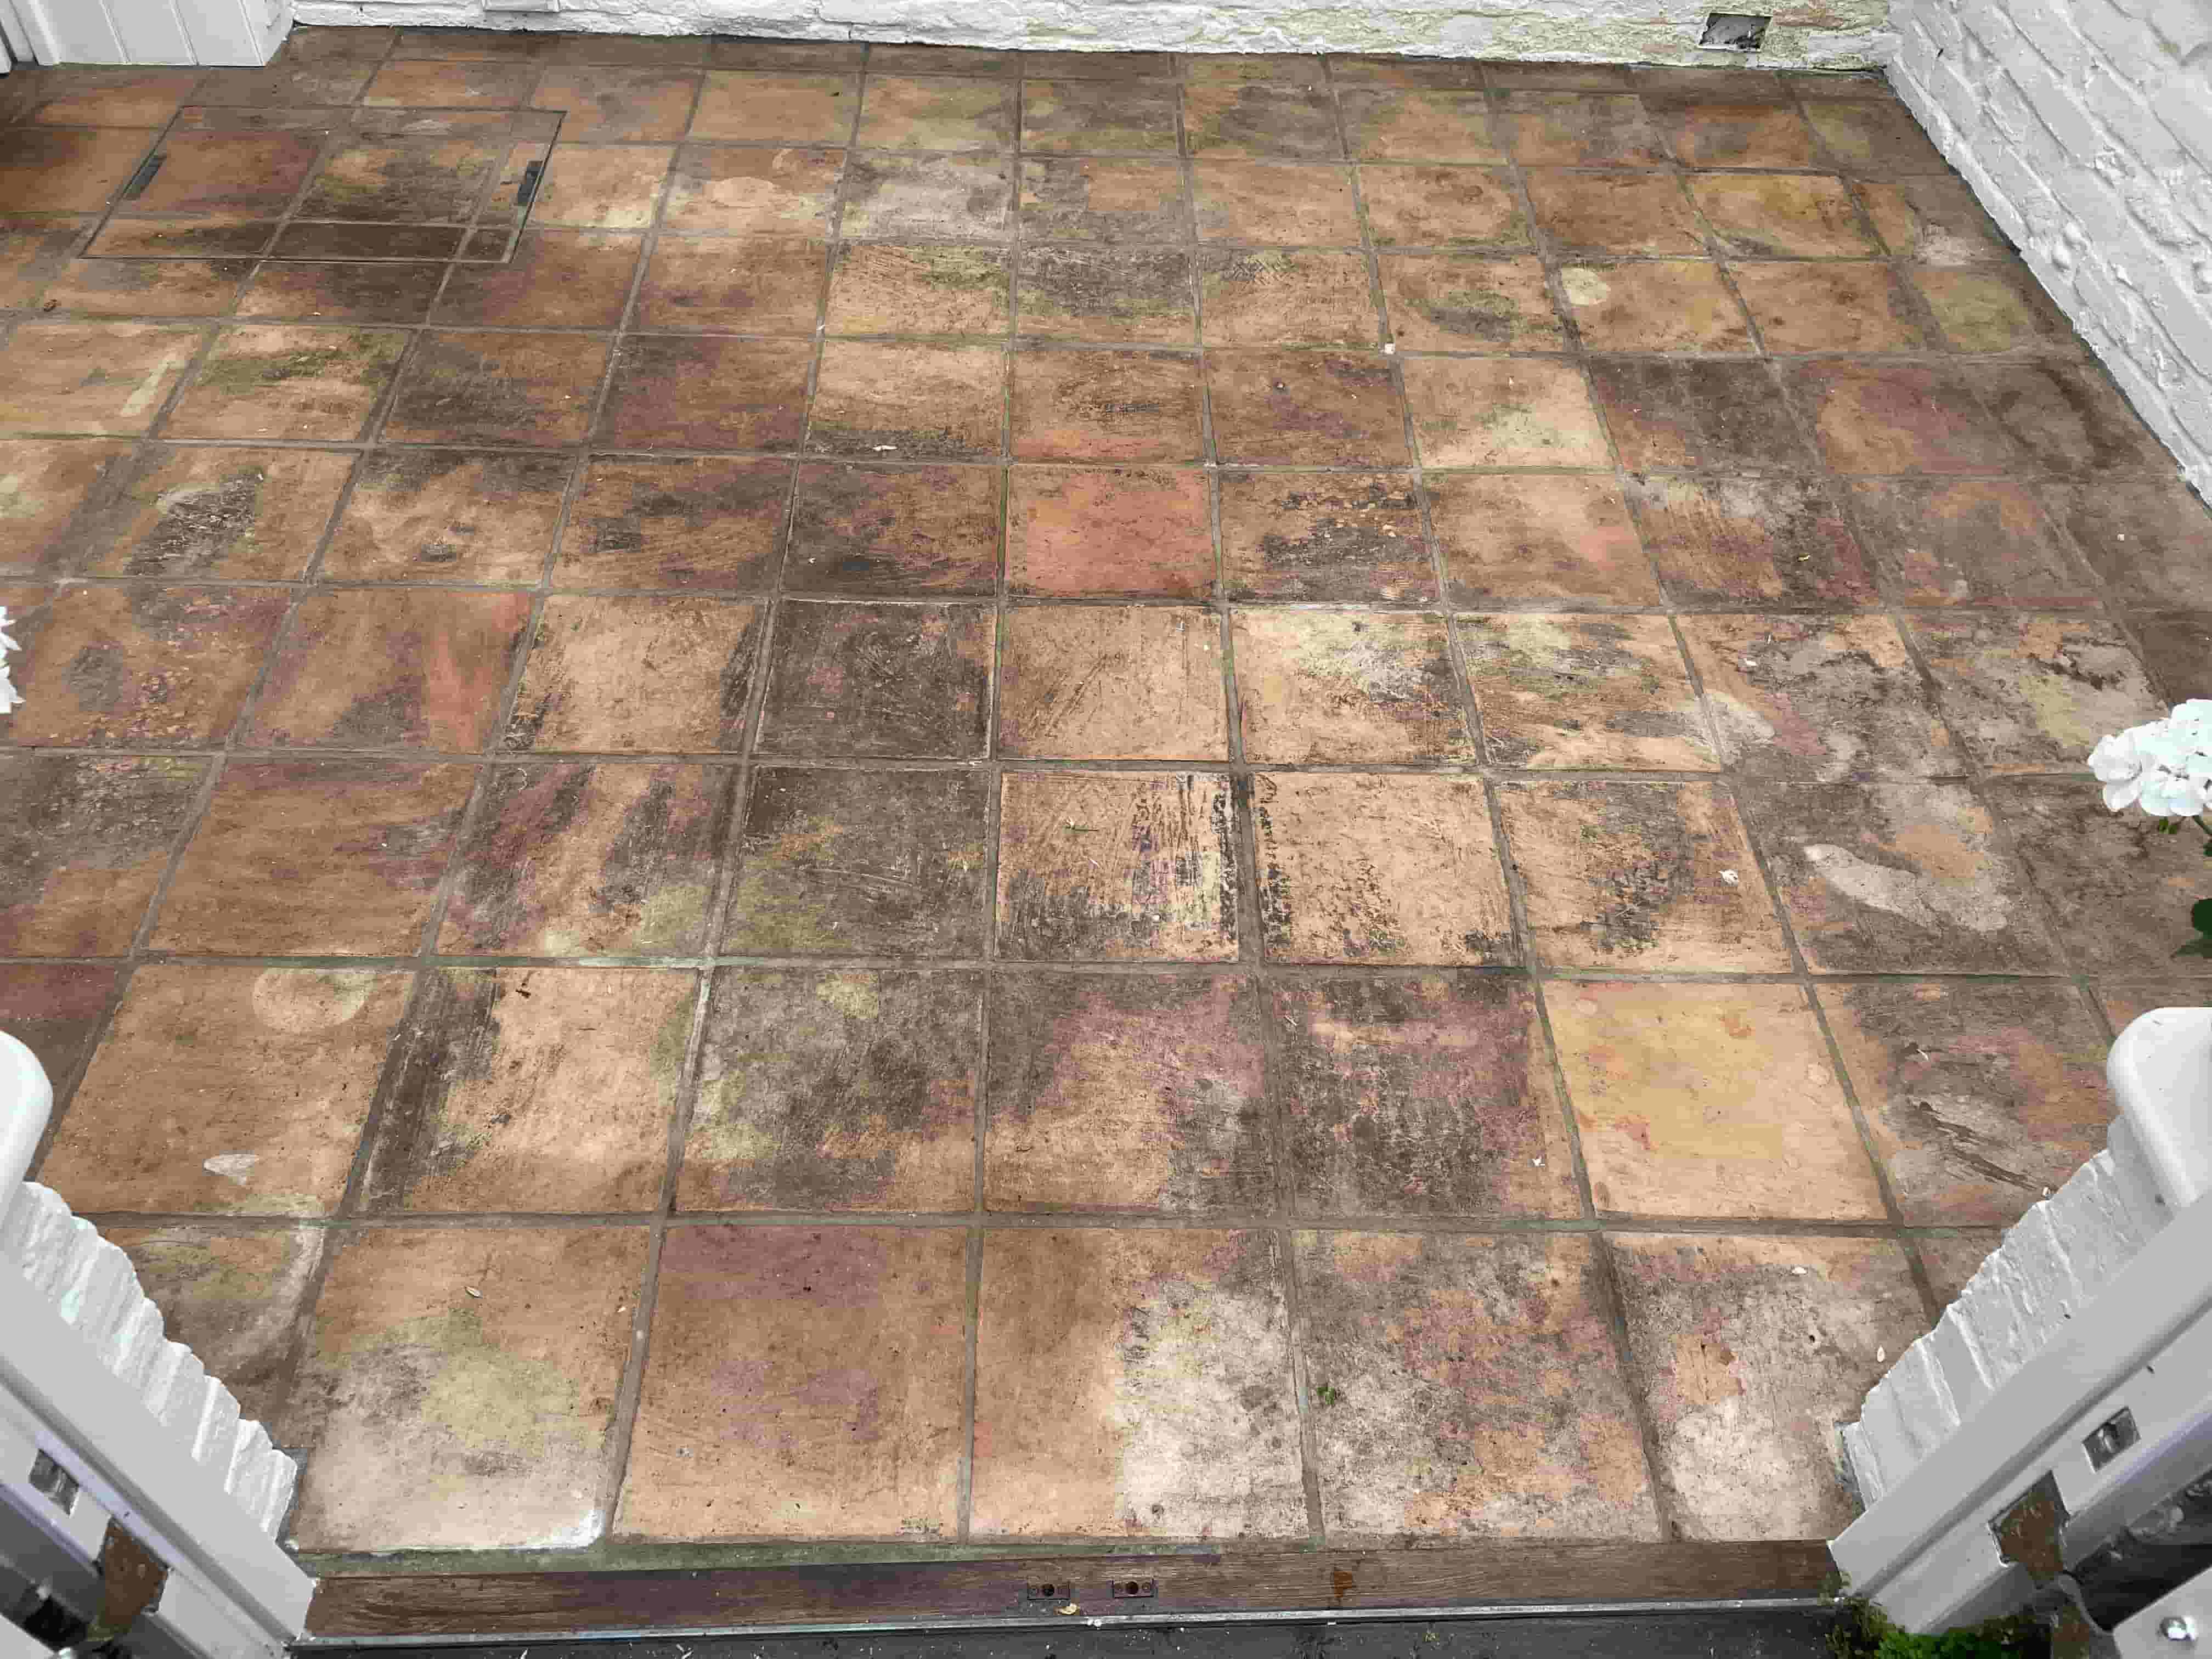
Terracotta Floor Before Cleaning Sandwich Kent

The floor hadn’t been cleaned in years and the porous nature of the Terracotta tiles meant that the floor had taken on a lot of dirt. During my visit to the property, I carried out a small cleaning test on one of the tiles to show the client what they could expect by way of results. The test went well, and I was able to work out an accurate quote for the renovation. Happy with the test clean and my quote I was booked to do the work and we arranged a convenient date of my return.

Terracotta Floor Before Cleaning Sandwich Kent Terracotta Floor Before Cleaning Sandwich Kent

Sandwich is a beautiful historic part of Kent, it was one of the Cinque Ports and still retains many of its medieval buildings and older properties. As you may have suspected the town also gave the name to the food, we regularly tuck into courtesy of John Montagu who was the 4th Earl of Sandwich.

Cleaning Dirty Terracotta Floor Tiles in Sandwich

Working in sections I started with the application of a strong solution of Tile Doctor Pro-Clean which was left to soak into the tiles for roughly ten minutes. This was then worked into the Terracotta using a 400-grit burnishing pad fitted to a rotary buffer machine. The process generated a lot of red slurry which was vacuumed away using an industrial wet vacuum. The tiles were exceptionally dirty and more rinsing with water, and vacuuming was needed to remove all the soiling.

Terracotta Floor During Cleaning Sandwich Kent

The pad had struggled to reach into the pits of the tiles and recessed grout so for the next step I chose to fit a nylon wire attachment to the floor buffer and run it over the tiles and the especially the grout. This did the job and cleaned out the puts and the grout lines very well. The floor immediately looked significantly better.

Using fresh water with a weak solution of Tile Doctor Grout Clean Up, a mop and bucket the floor was given an acid wash to remove any old grout smears and neutralise any alkaline salts that could lead to efflorescence issues later. Once done the floor was rinsed with more water and the solution vacuumed off the floor. The floor was then left to dry for two days so it would be ready for the next step of sealing.

Sealing Old Terracotta Floor Tiles in Sandwich

Two days later I returned on schedule ready to apply a fresh sealer. I was concerned about the amount of water used during the cleaning process, so I started by checking the moisture level of the tiles with a damp meter.

I was happy with the readings so lost no time in applying the sealer. Three coats of Tile Doctor Colour Grow were applied which is an impregnating breathable sealer that soaks into the Terracotta occupying its pores and preventing dirt from residing there. This product contains a colour enhancing element that really brings out the colour in the Terracotta and being fully breathable it will be able to cope with any moisture rising through the tile which can be an issue with these old floors that don’t have a damp proof membrane.

Terracotta Floor After Cleaning Sandwich Kent

With a sealer now in place protecting the floor any dirt will remain on the surface where it can be easily mopped away. On that note I recommended the use of Tile Doctor Neutral Tile Cleaner for regular cleaning, this will ensure that the floor can be cleaned without compromising the newly applied sealant. Household cleaners tend to contain strong chemicals which will break down the seal prematurely.

Terracotta Floor After Cleaning Sandwich Kent

The client was very happy and left the following feedback, its short but he gets the message across.

‘Graham did an excellent job thank you’


Professional Restoration of a Terracotta Tiled Conservatory, Kitchen and Dining Room Floor in Kent

Dirty Terracotta Floor Deep Cleaned and Sealed in Sandwich Read More »

Scroll to Top